
Broken Pecker
Mr. Horsepower, the iconic cigar-smoking woodpecker originally drawn to resemble Clay Smith of Clay Smith Cams and has been used so much in the Hot Rod world that I feel like I need to do my own rendition. I have always been the “Bull in the China Closet”…Mine has to look just as recklessly as I am.
The following is an adventure (step-by-step) into how I came up with my own rendition of this iconic character.
Step 1:

For most clients I draw my ideas out on paper first, but when doing things for myself I tend to be just a little lazy. I am drawing this directly on the substrate.

Stabilo marking pencils are great to work with because the write on many surfaces and clean off very easily! You can find them here.
I always pre-draw my characters out so this one is no different. I draw the character with a blue Stabilo pencil directly onto a piece of 1/8” aluminum sign panel and work with it until I get everything right where I want it.
Step 2:
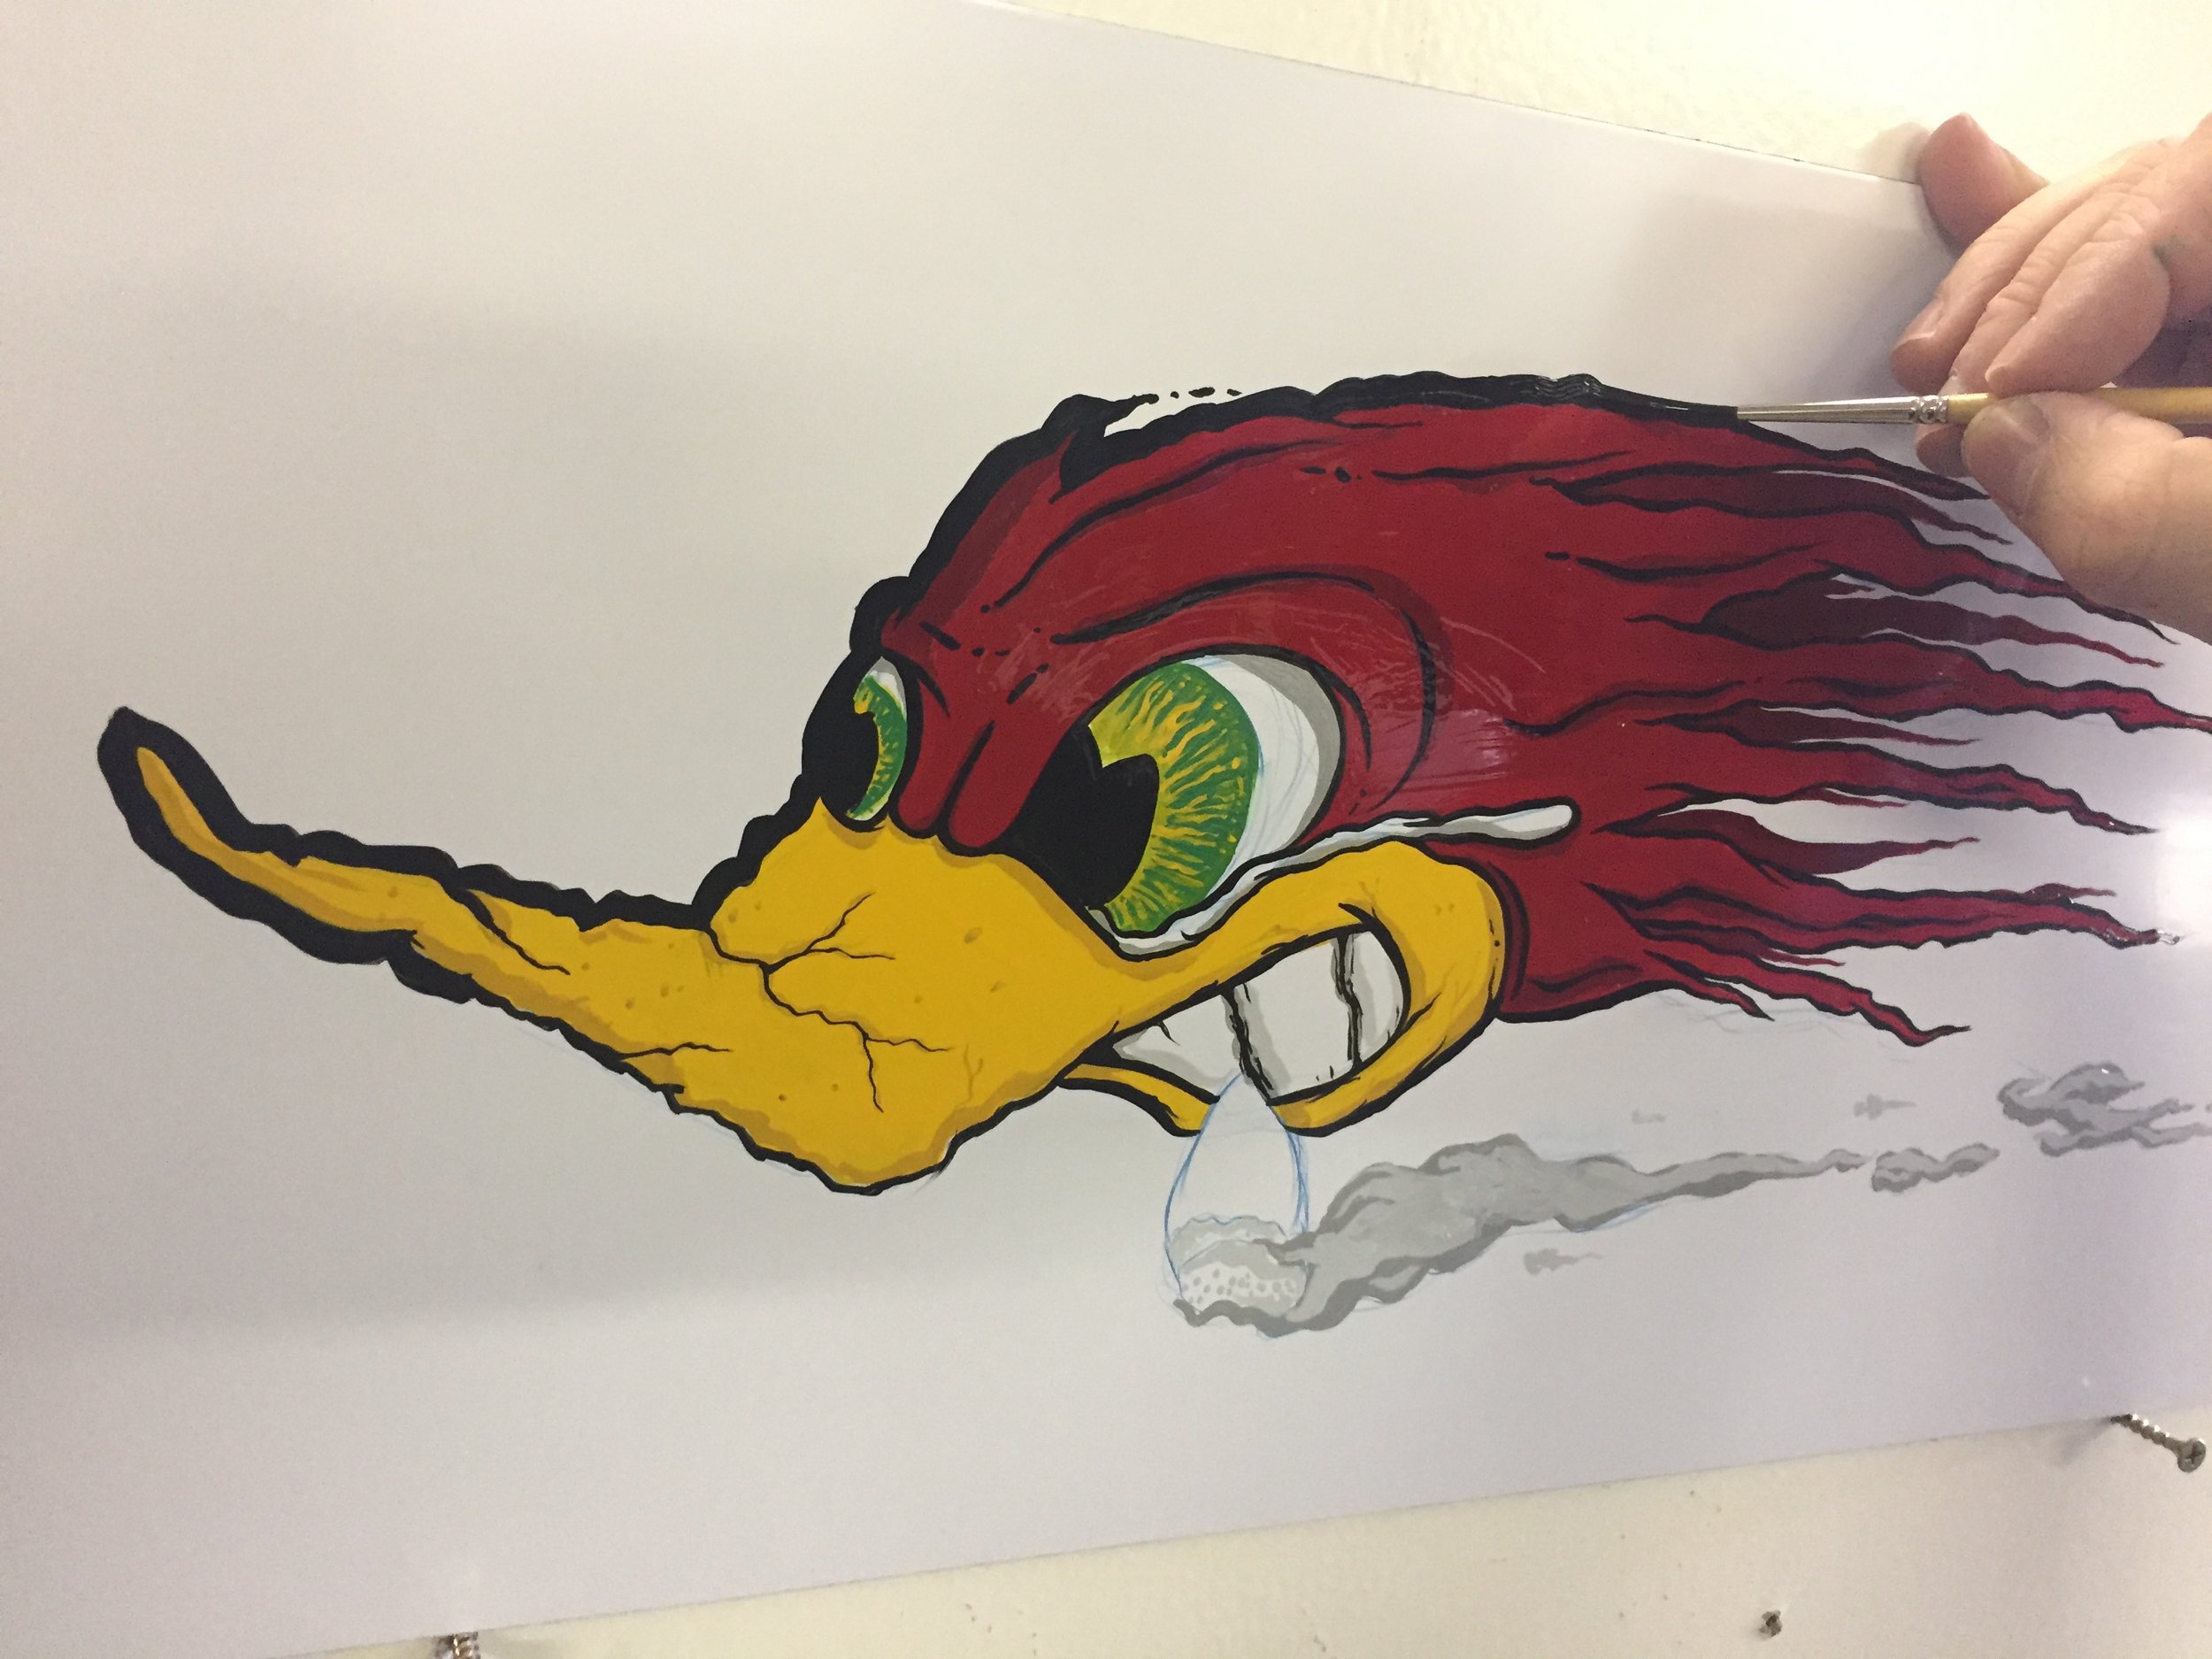
I am not quite sure what’s so fast about a woodpecker… but mine is going extra fast, so I made sure to put a little tear in his eye and extra long raggedy feathers.
He is a bit “nosey” too, so I have a bit of cracks and grit that will have to be done to the beak.
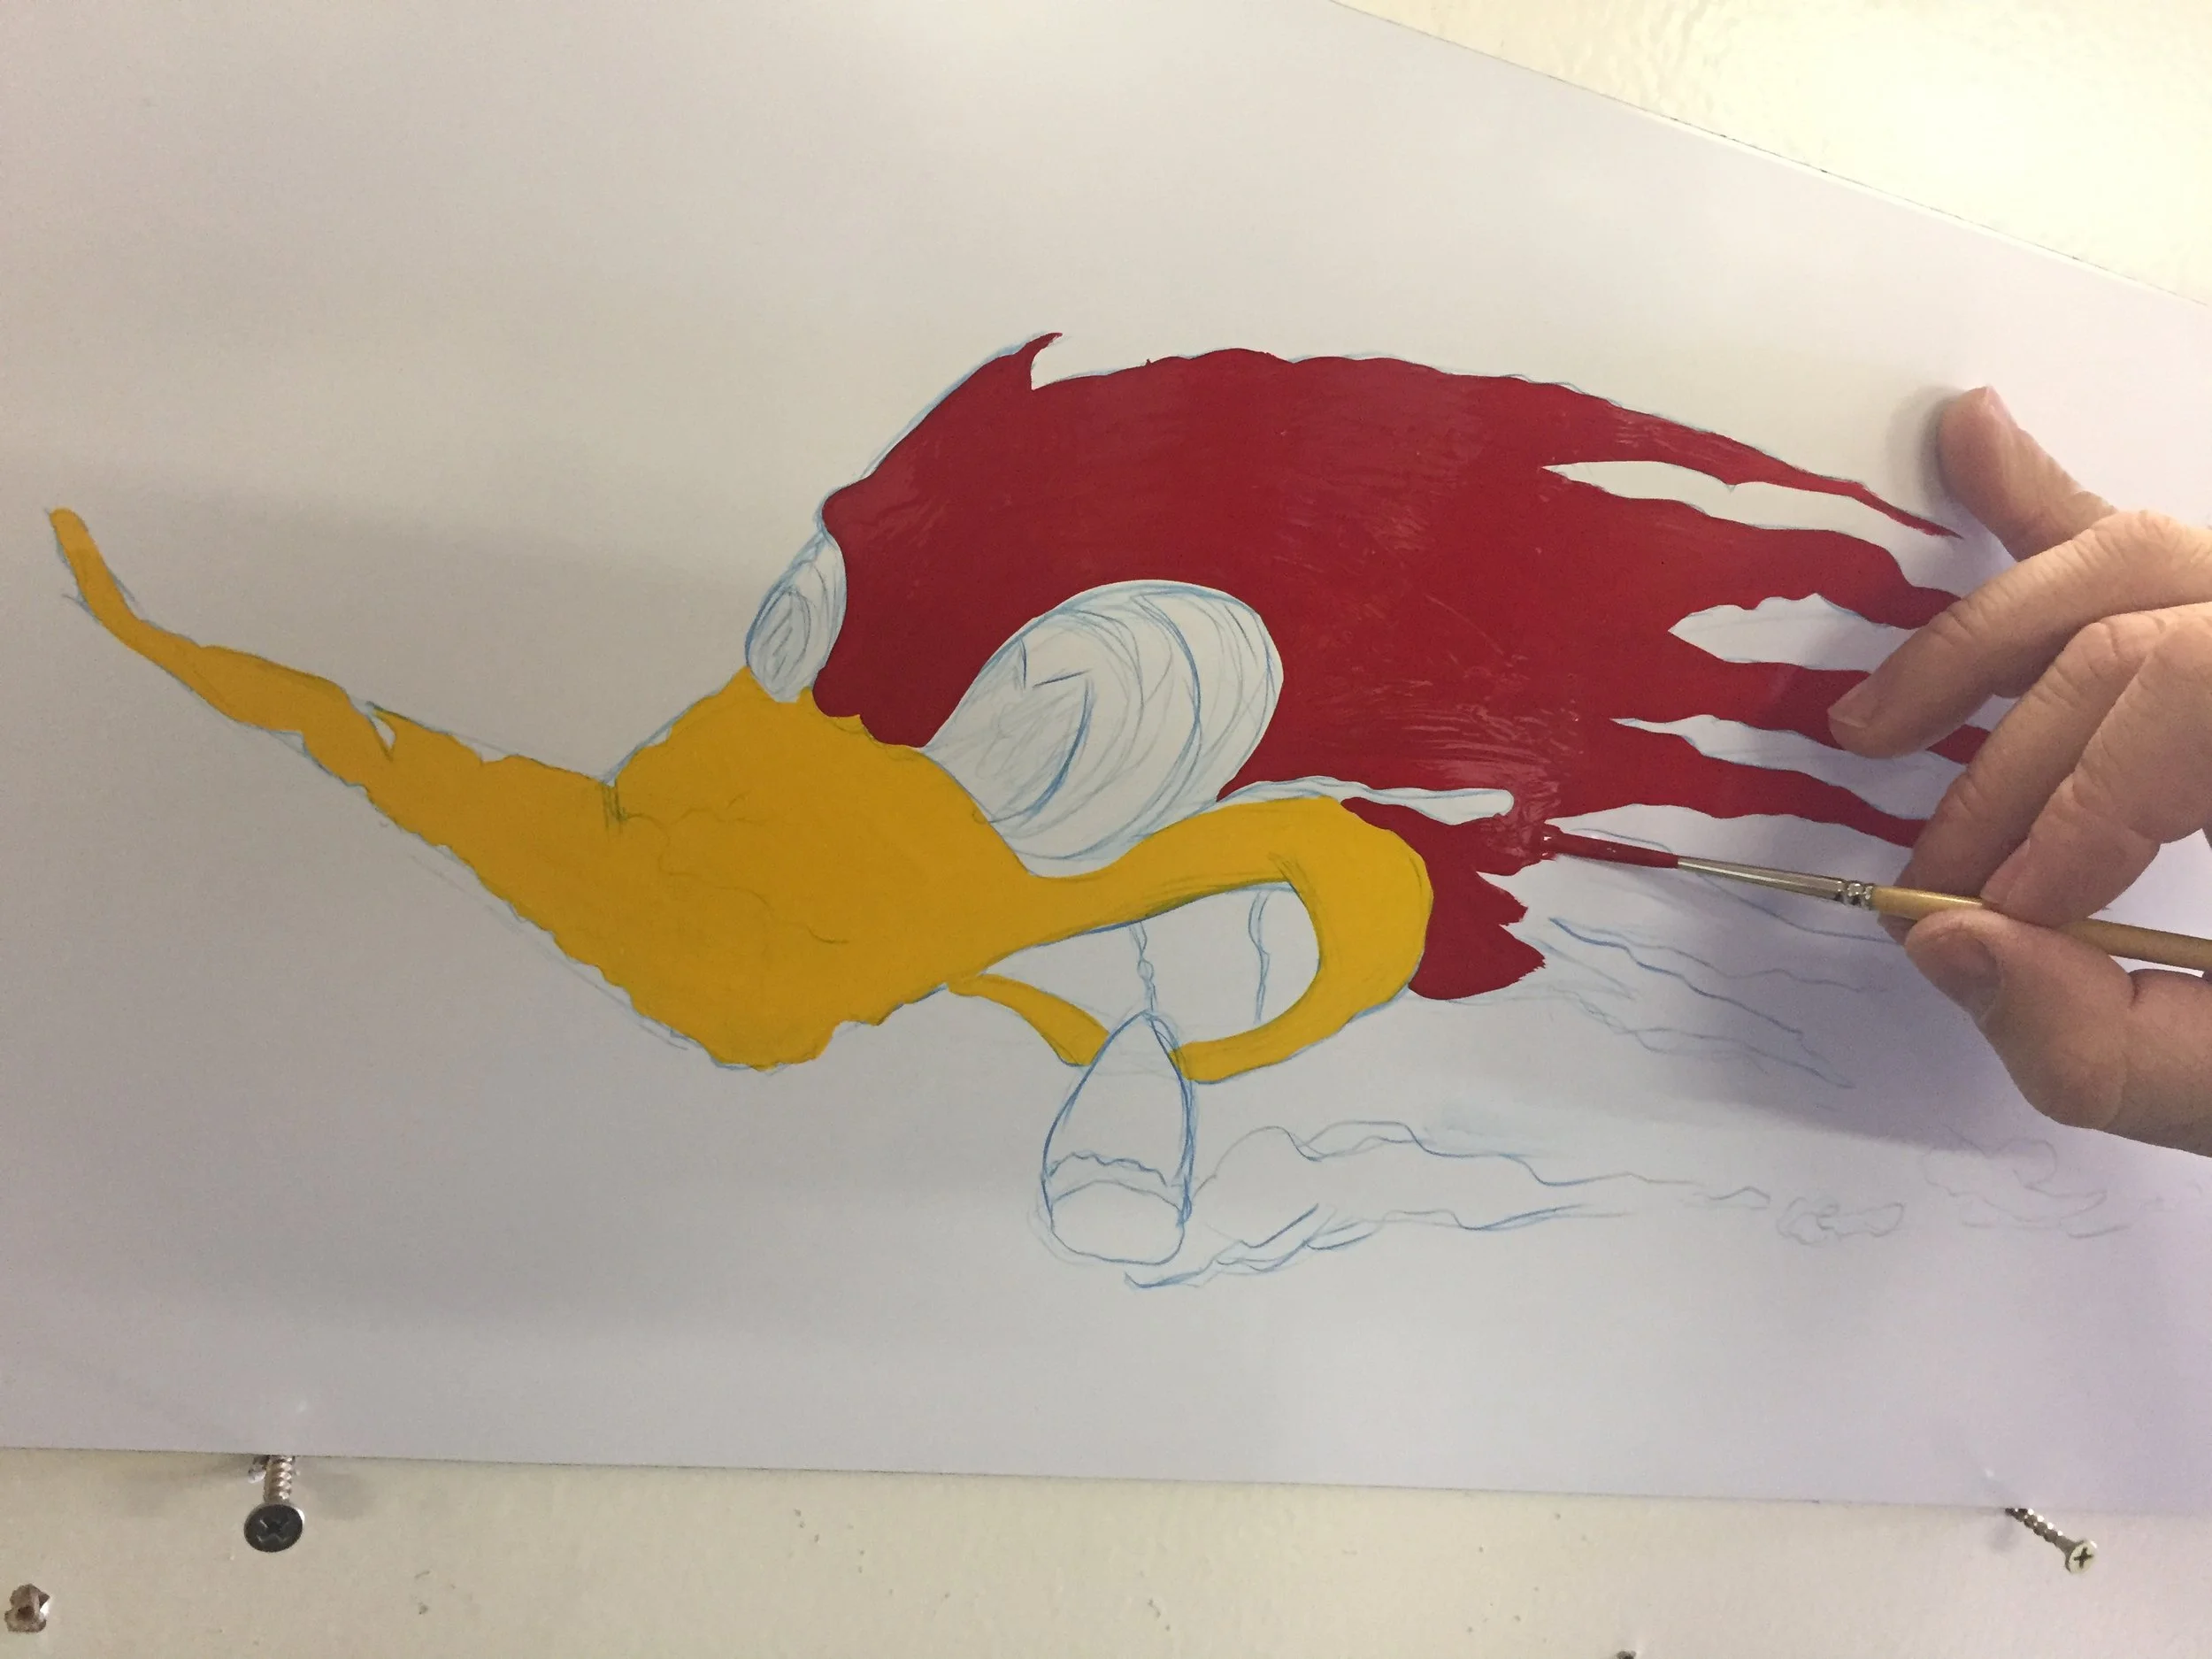
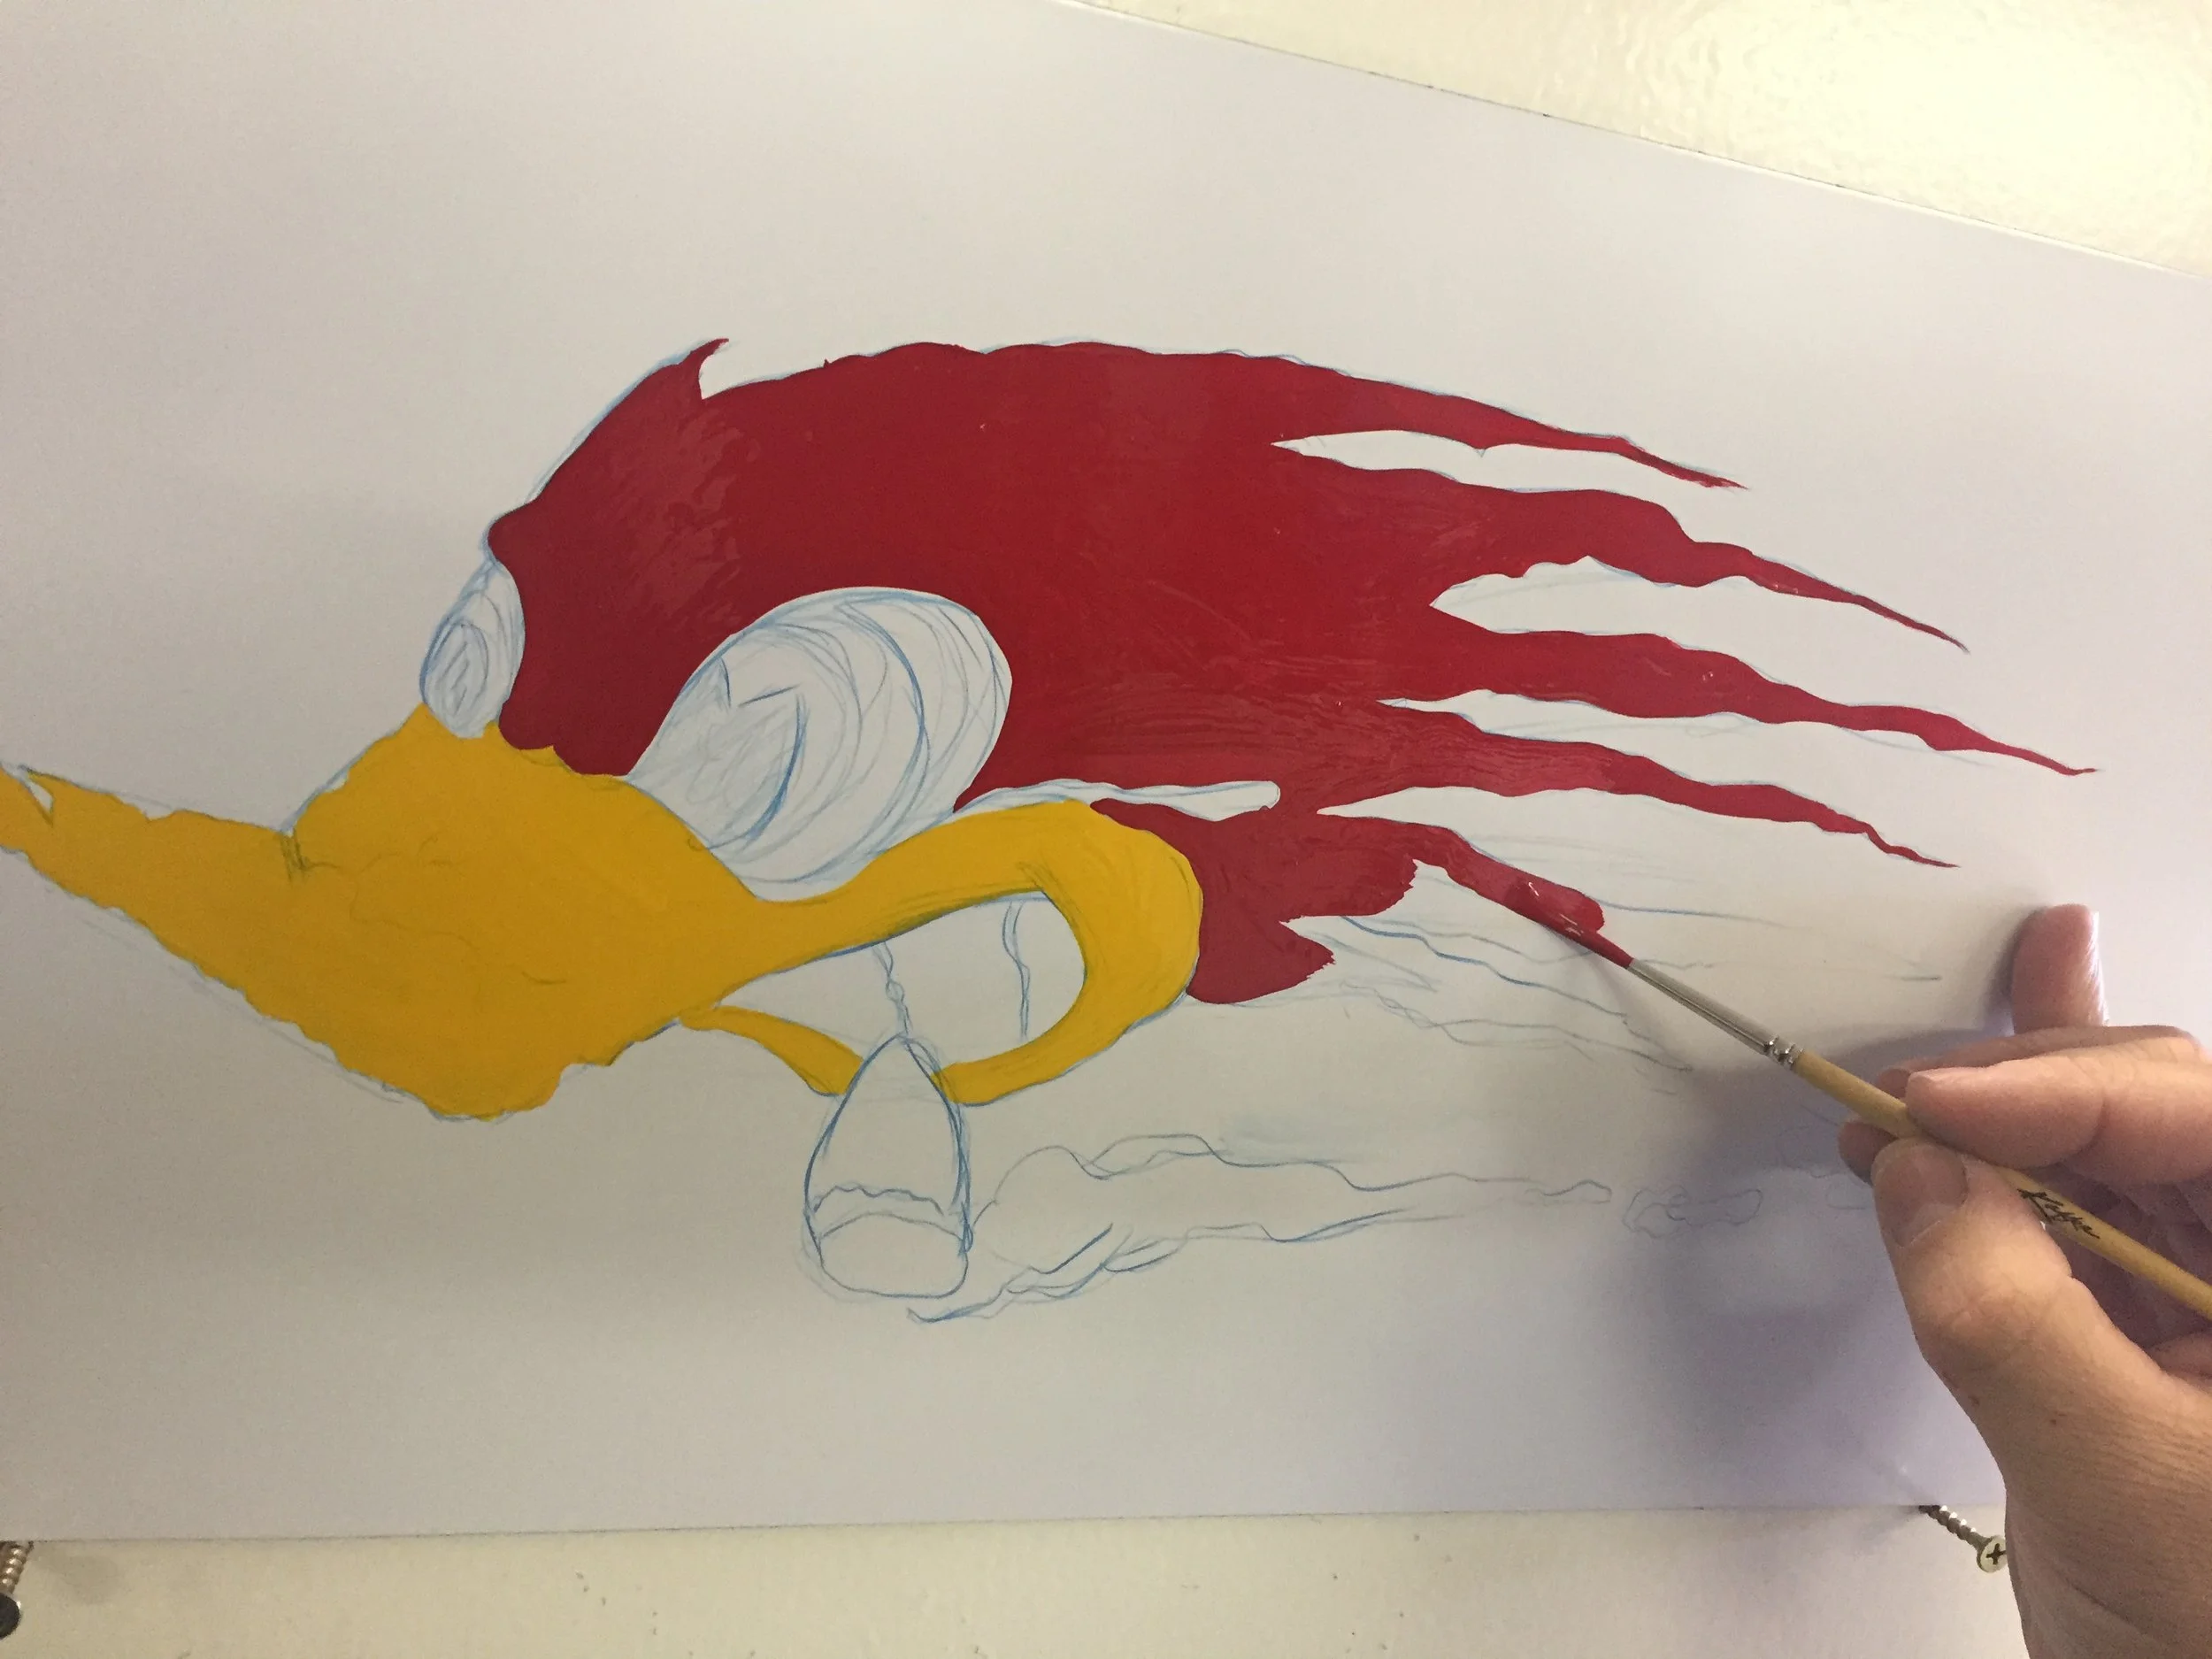
Well, with all of the iconic colors blocked in, you can finally see the resemblance to the original. We can’t do original though…
Now I start to block in some of the main color. For the painting I am using 1 Shot enamel paint and various brushes including some Kafka Lettering brushes for the blocking in and various Mack Brushes for details. This is what I will gradually be building all of the highlights and shadows off of along with the final details. I try to stay just inside all of my lines so I can keep things in order until I do the final details.
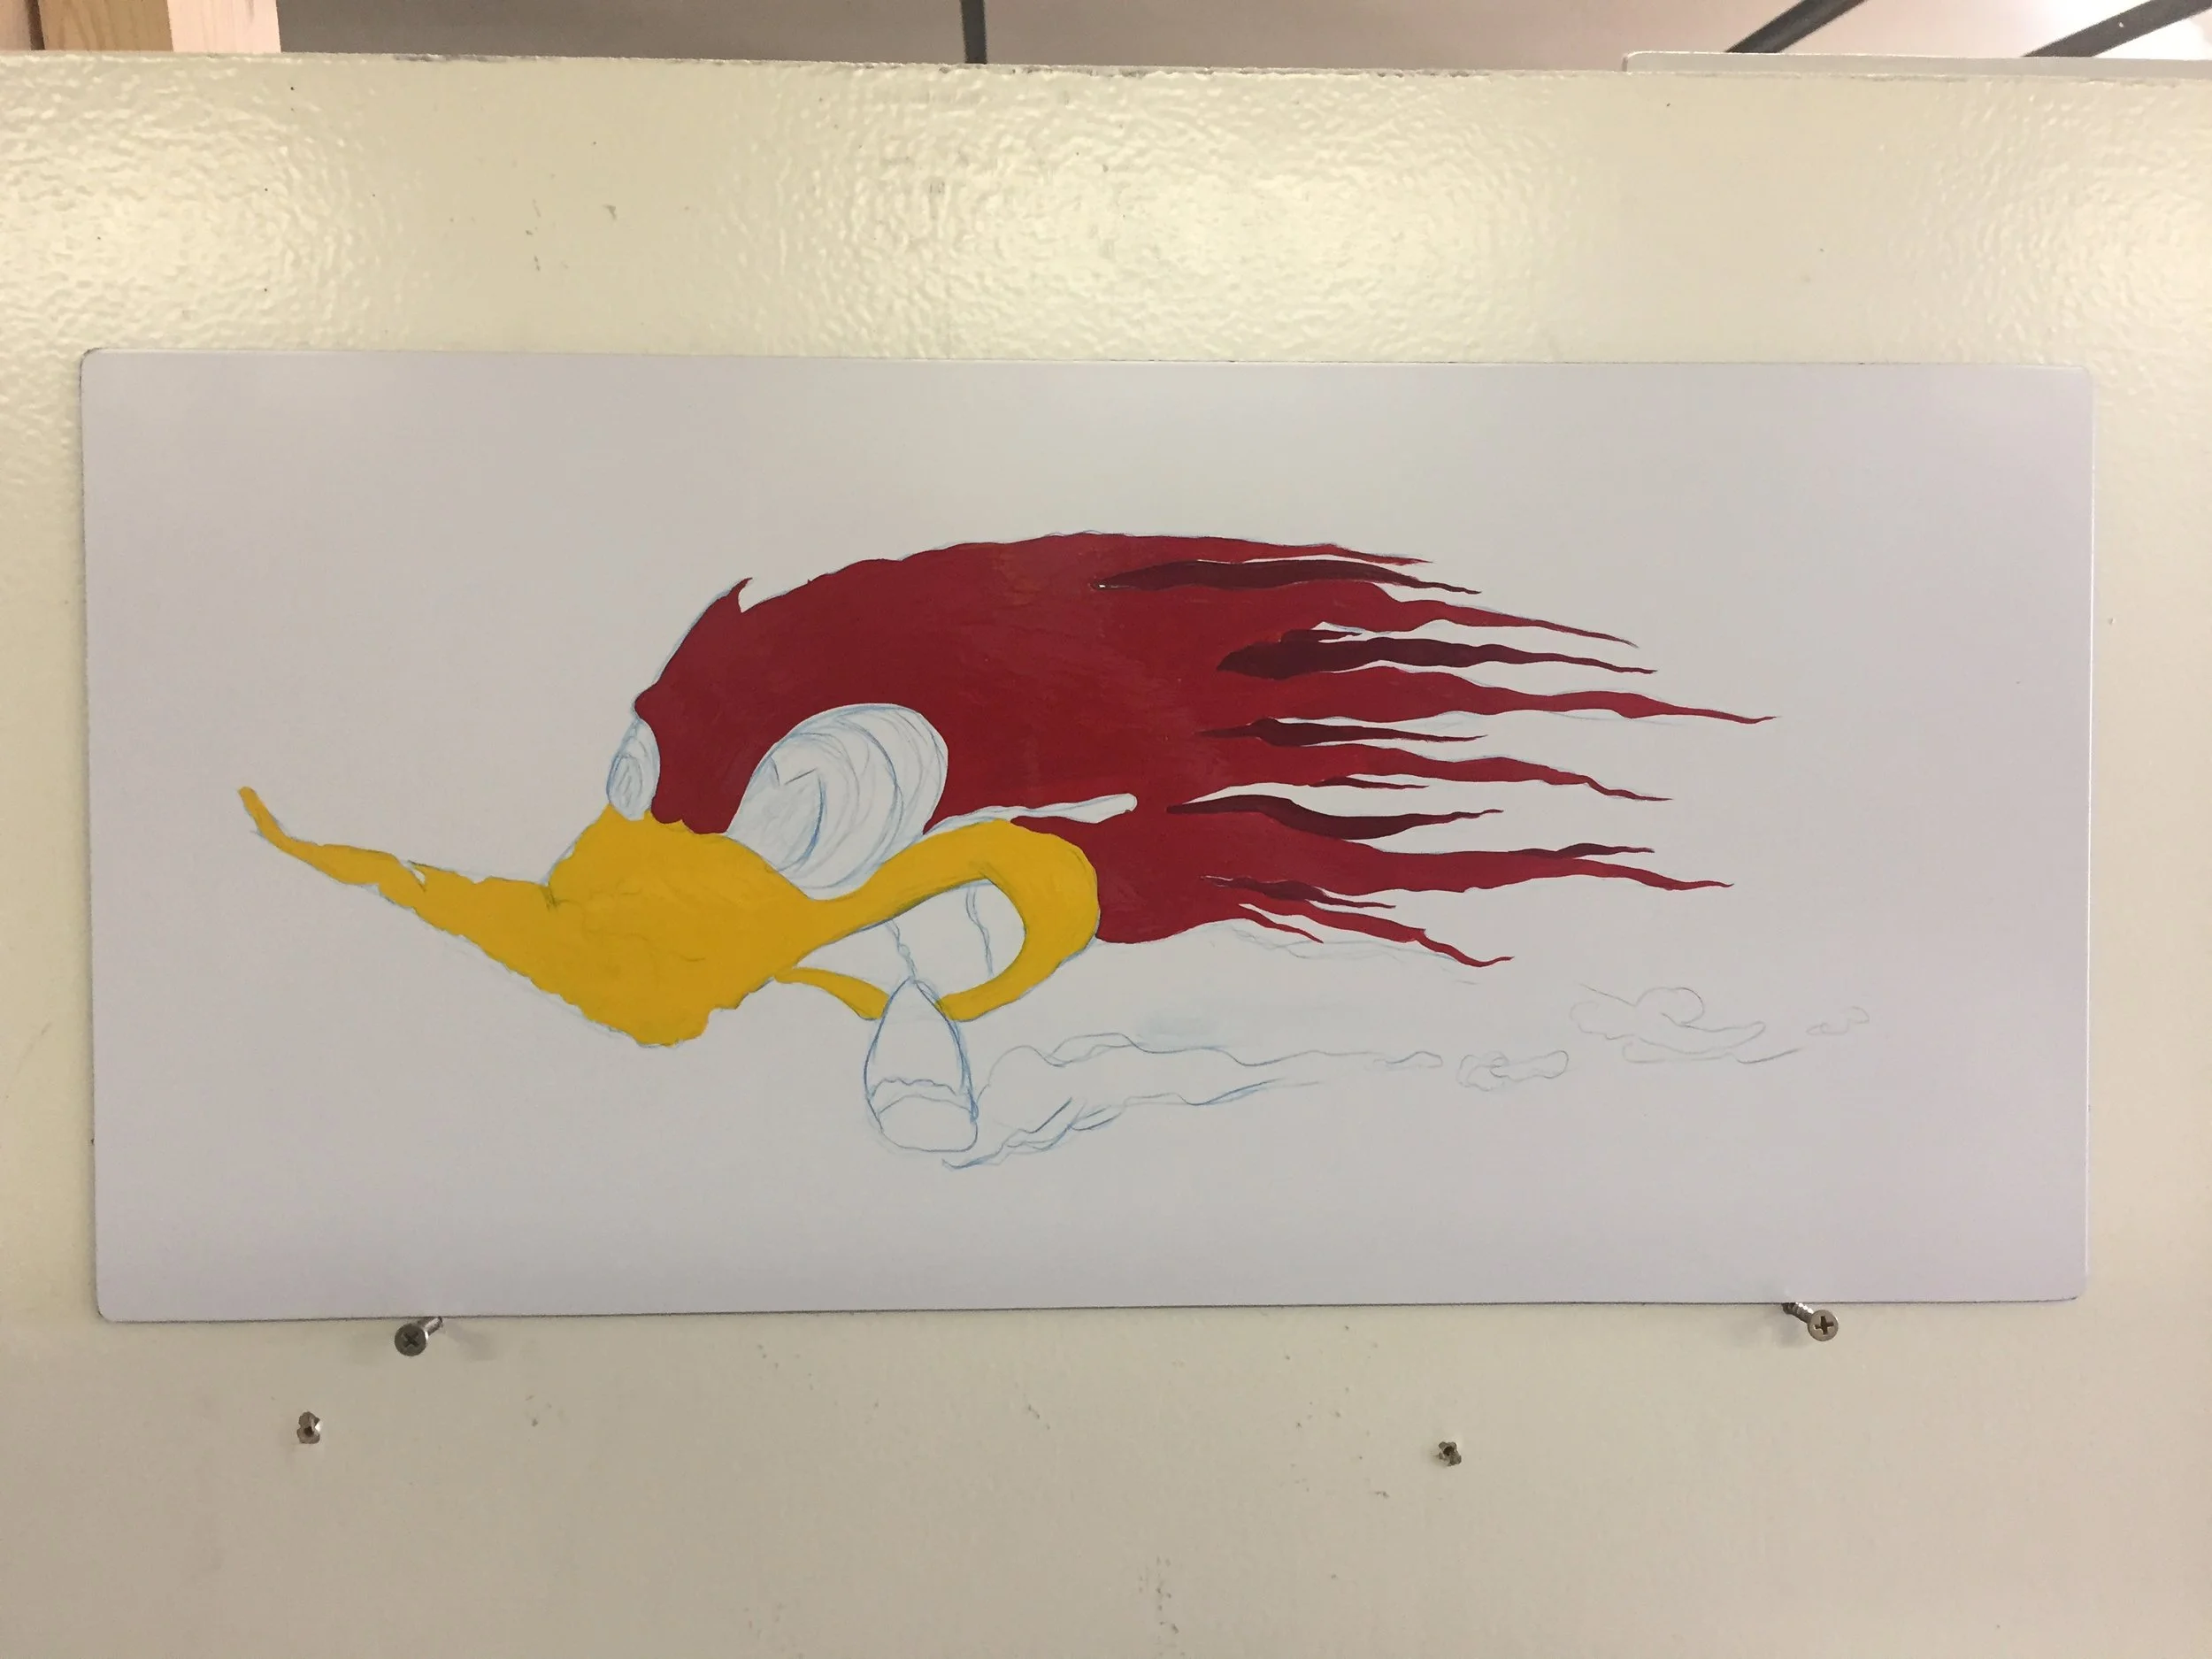
Step 3:
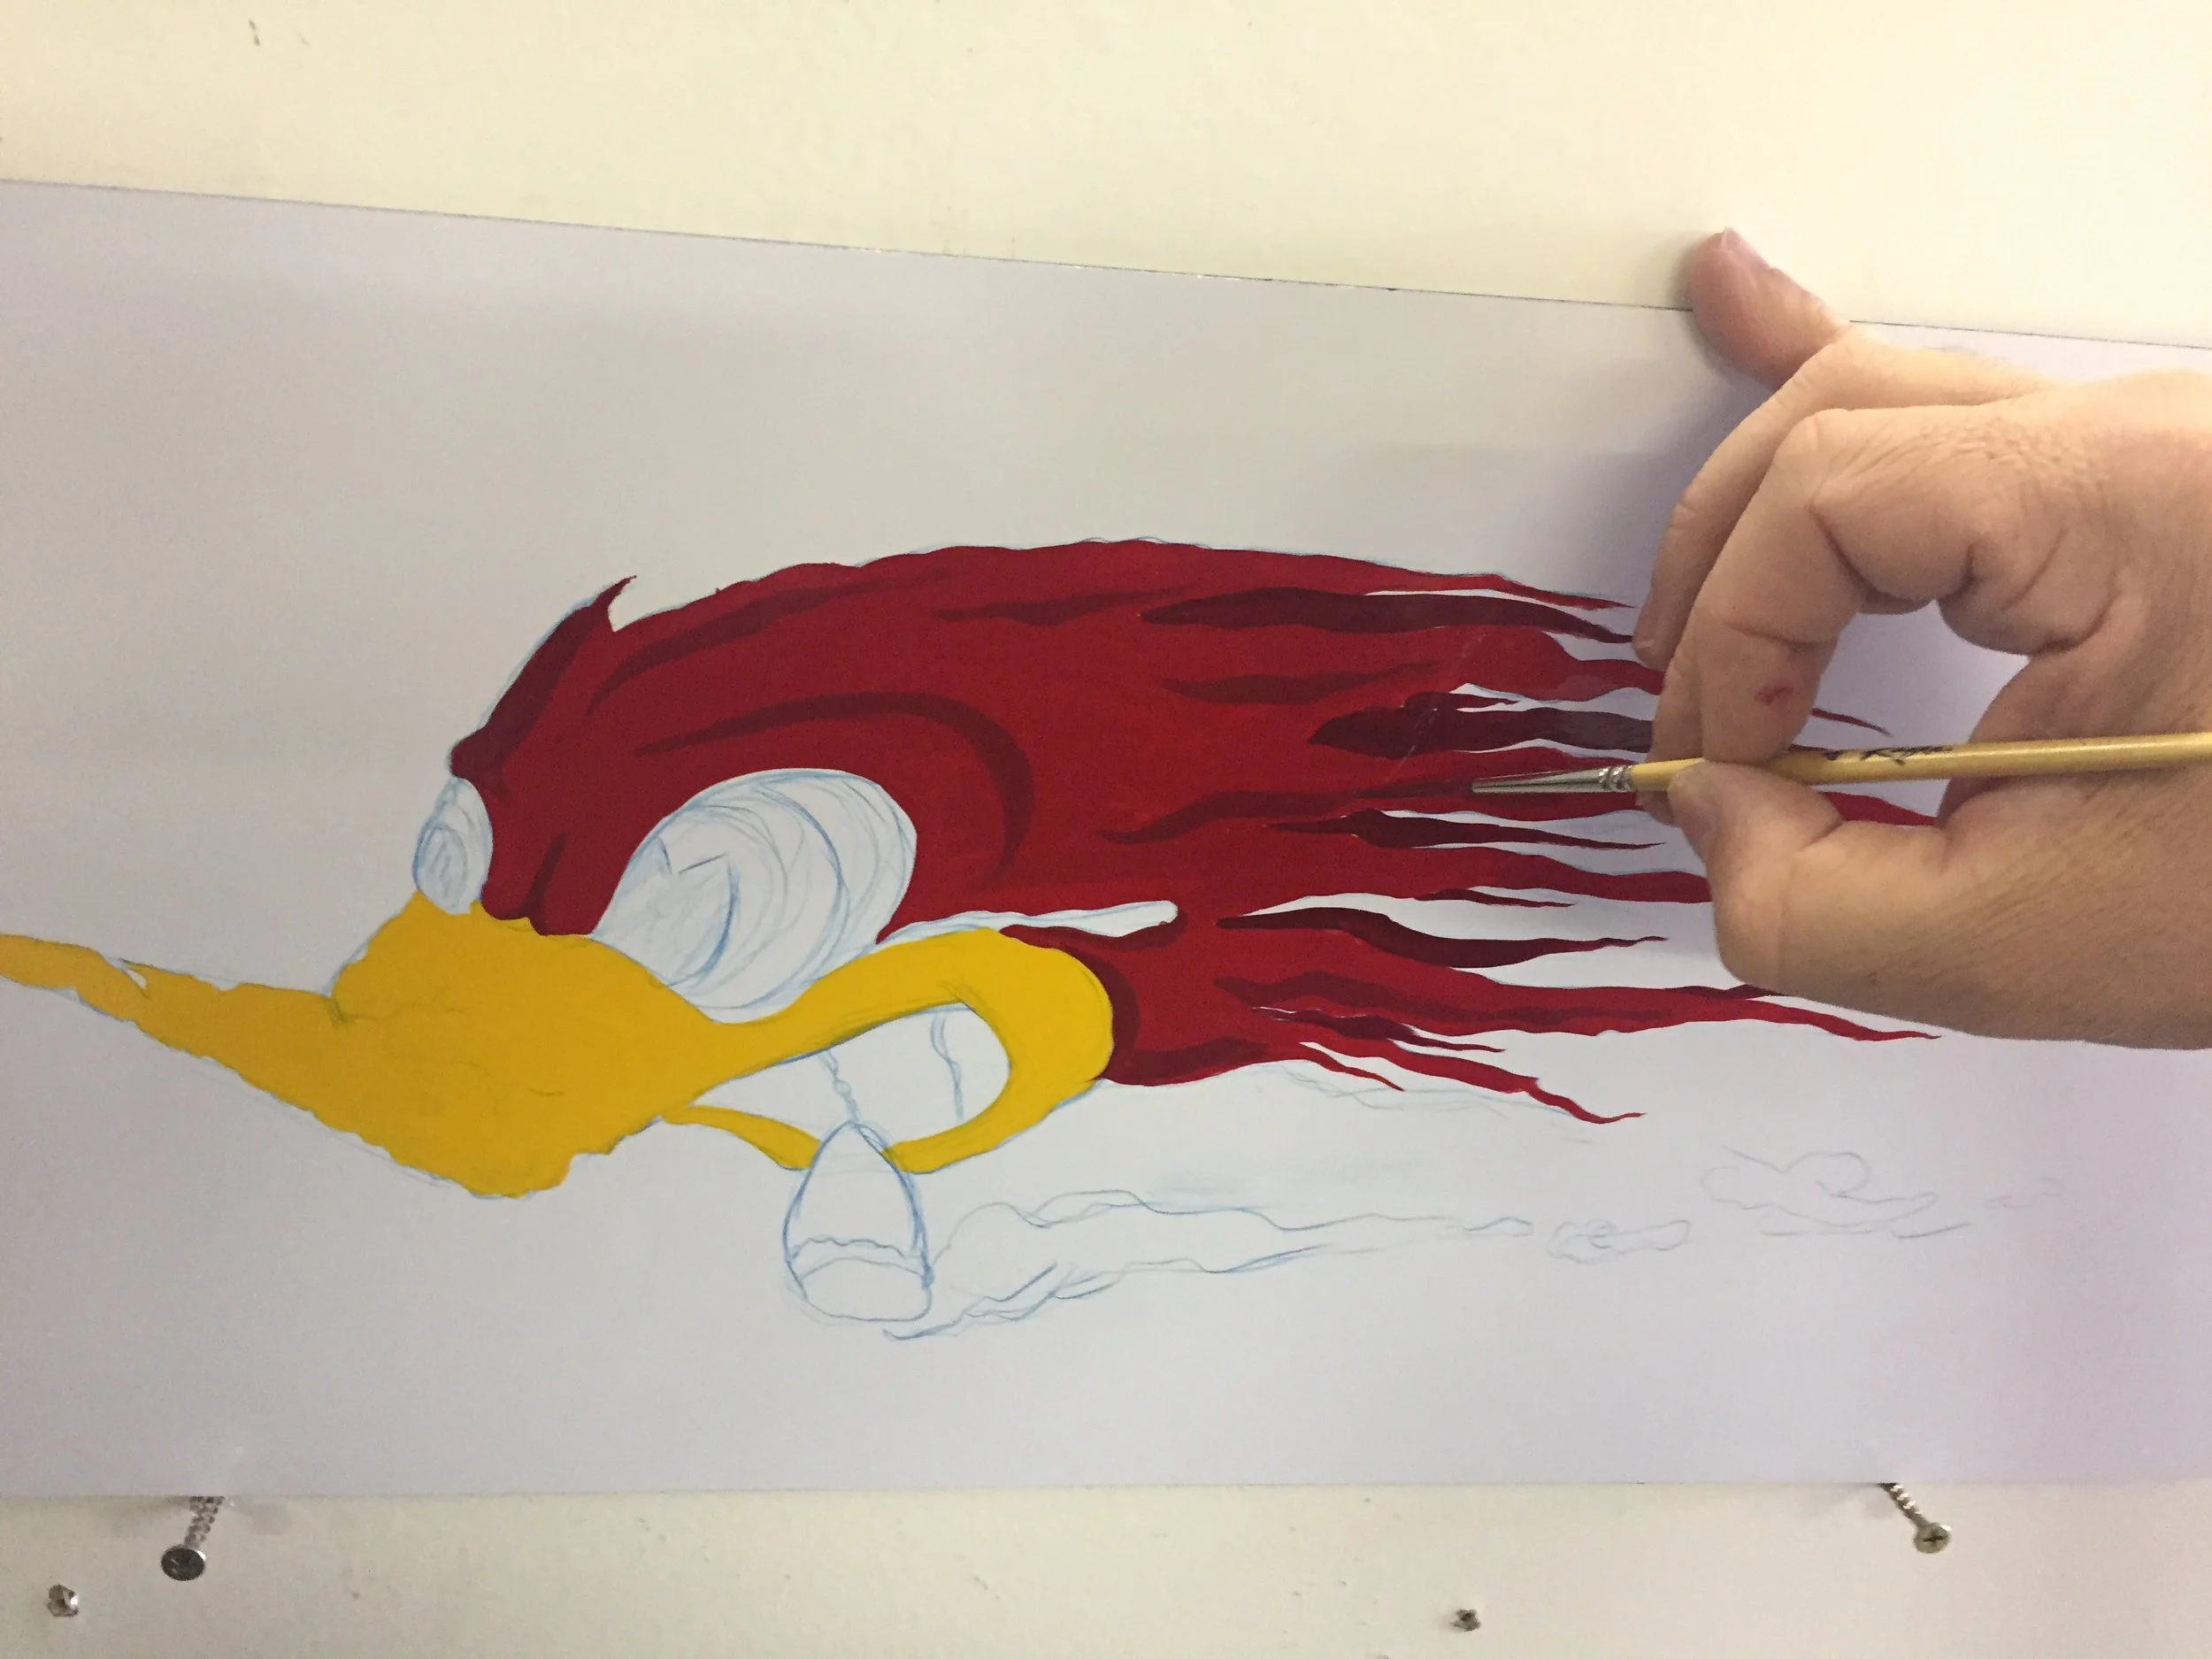
By adding a little maroon to my red, I am able to add i little shadowing to the feathers.
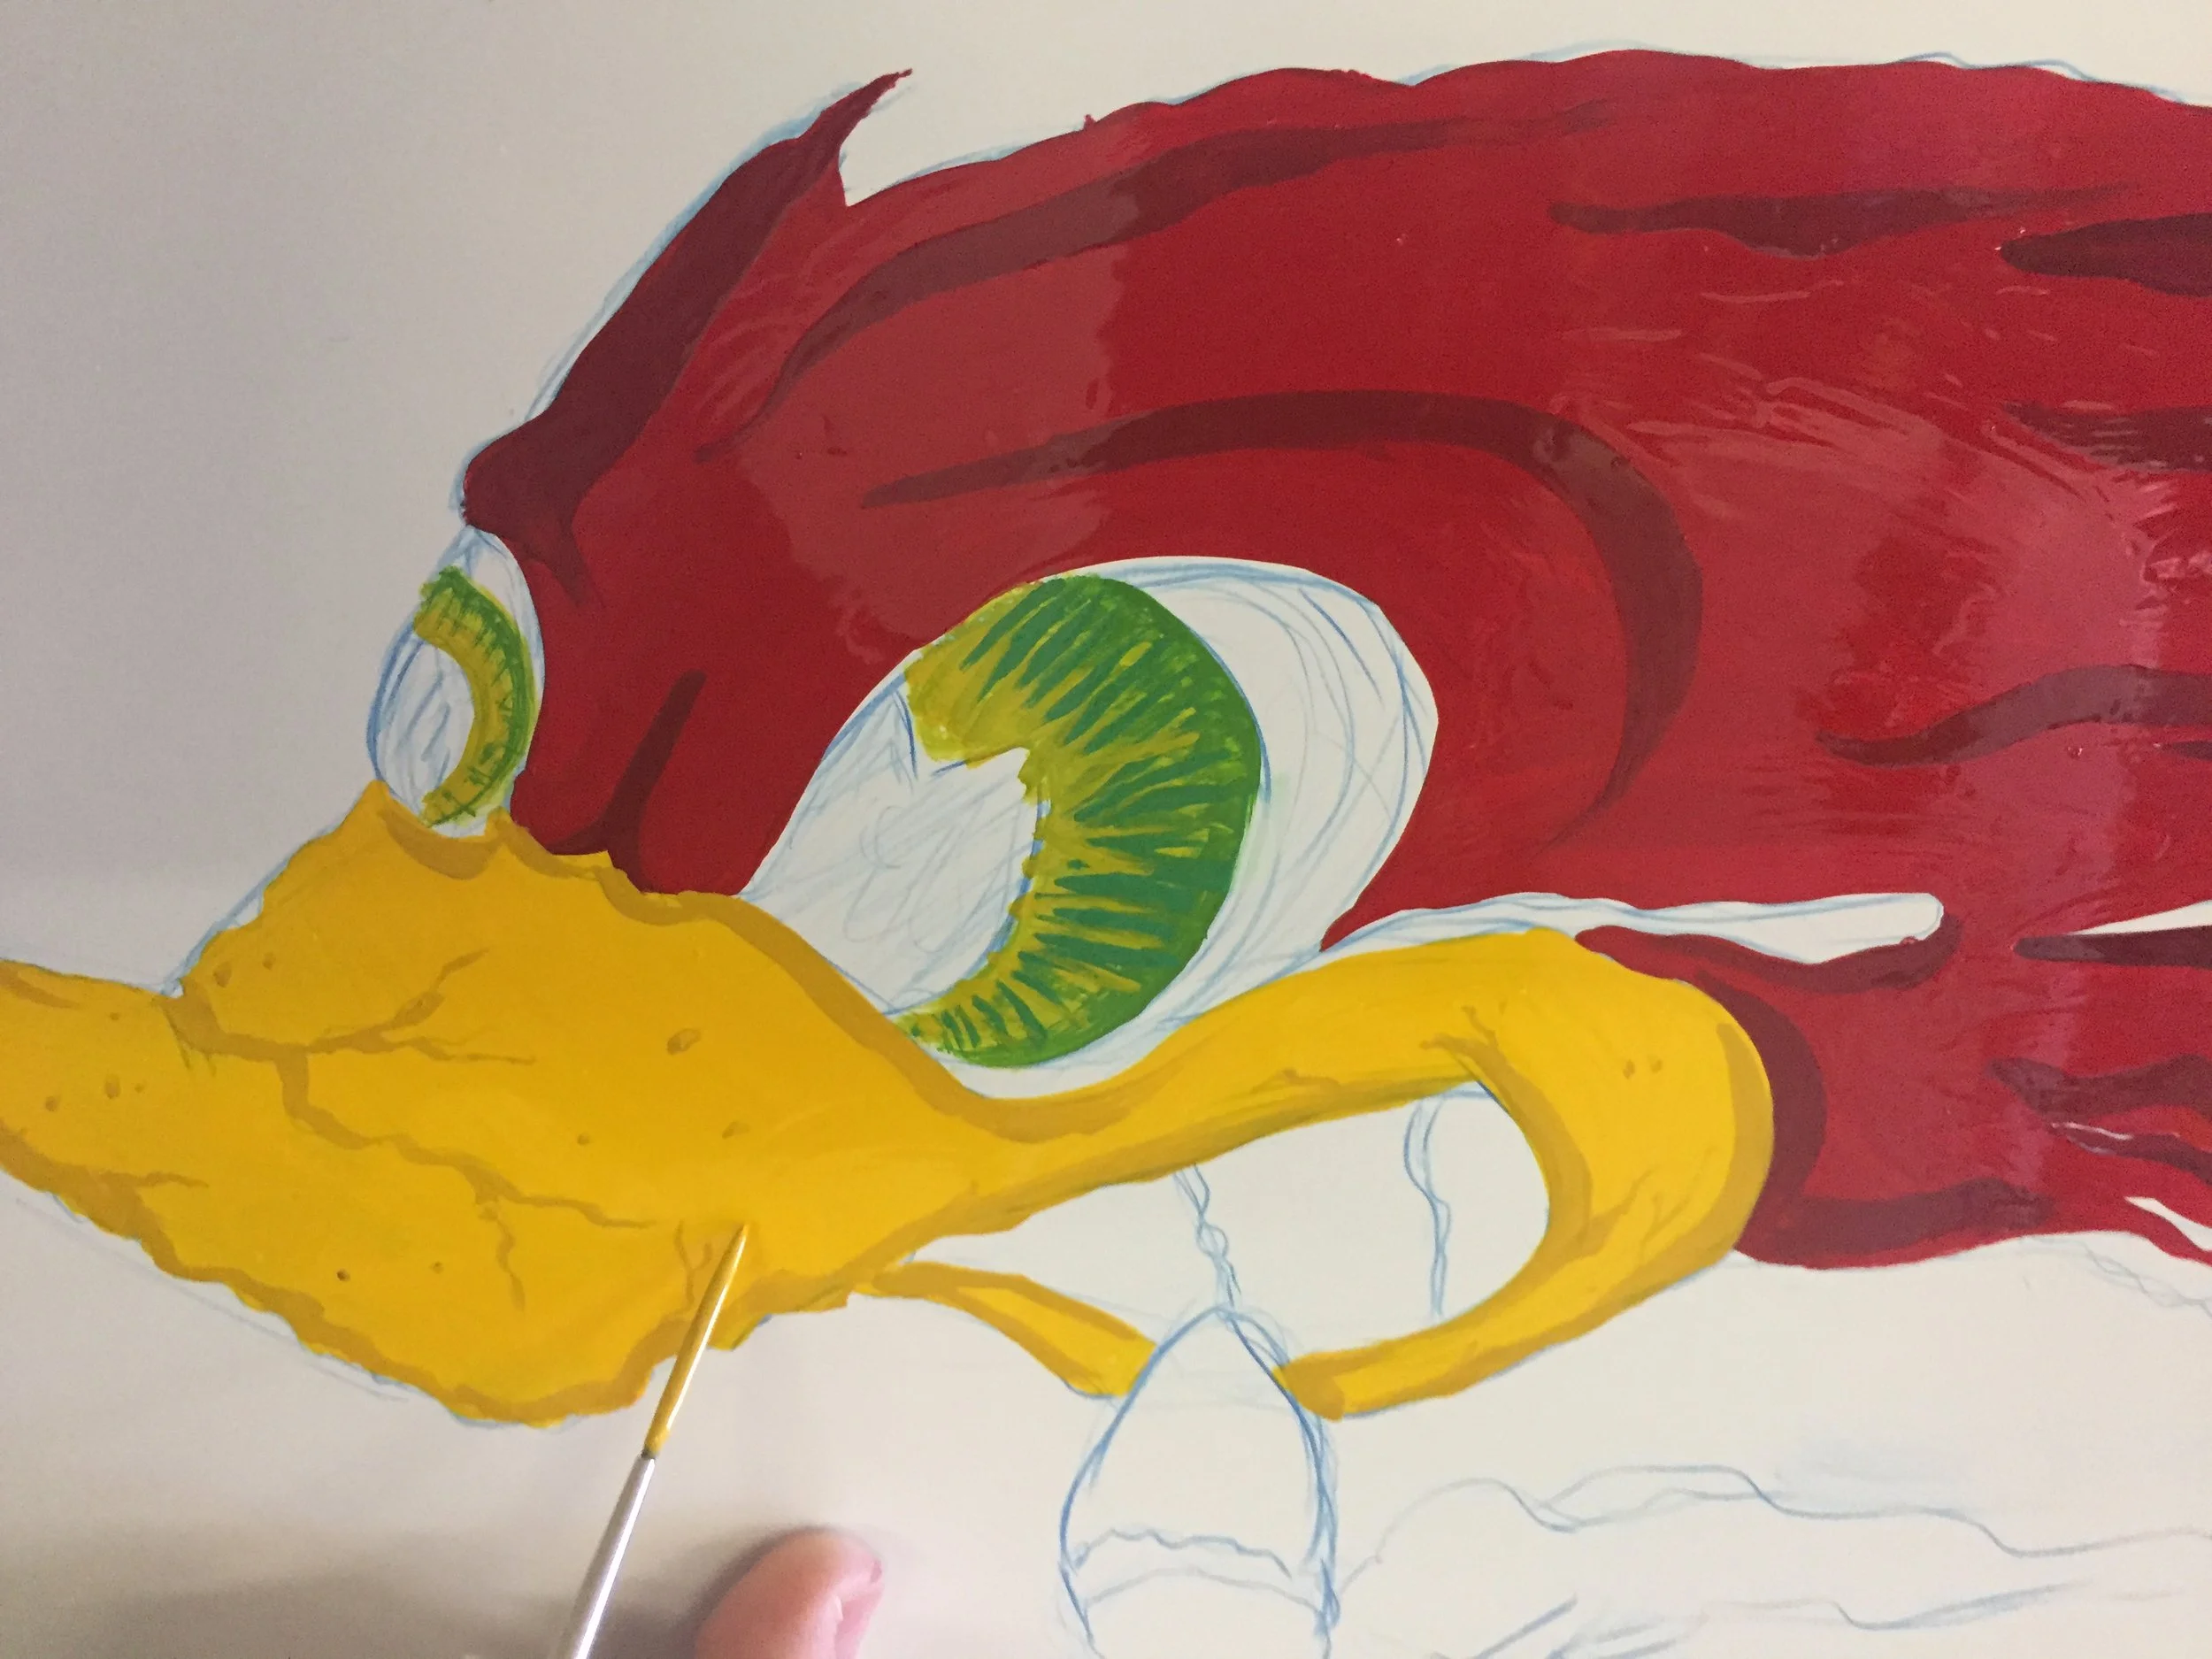
The original had just black details for the eyes but I wanted just a bit more bright colors, so I used some chrome yellow and emerald green to set the eyes and a bit of the chrome yellow and imitation gold for the beak.

Now it’s looking a bit more exciting.
Shadows start bringing depth to the piece and even without the final details, things are starting to look real interesting.
Now is when I start to bring some color to the eyes, shadowing into the feathers, and some cracks and grit to bring some life to the beak.
Step 4:

Here is where I start adding some gray to block out for the smoke.
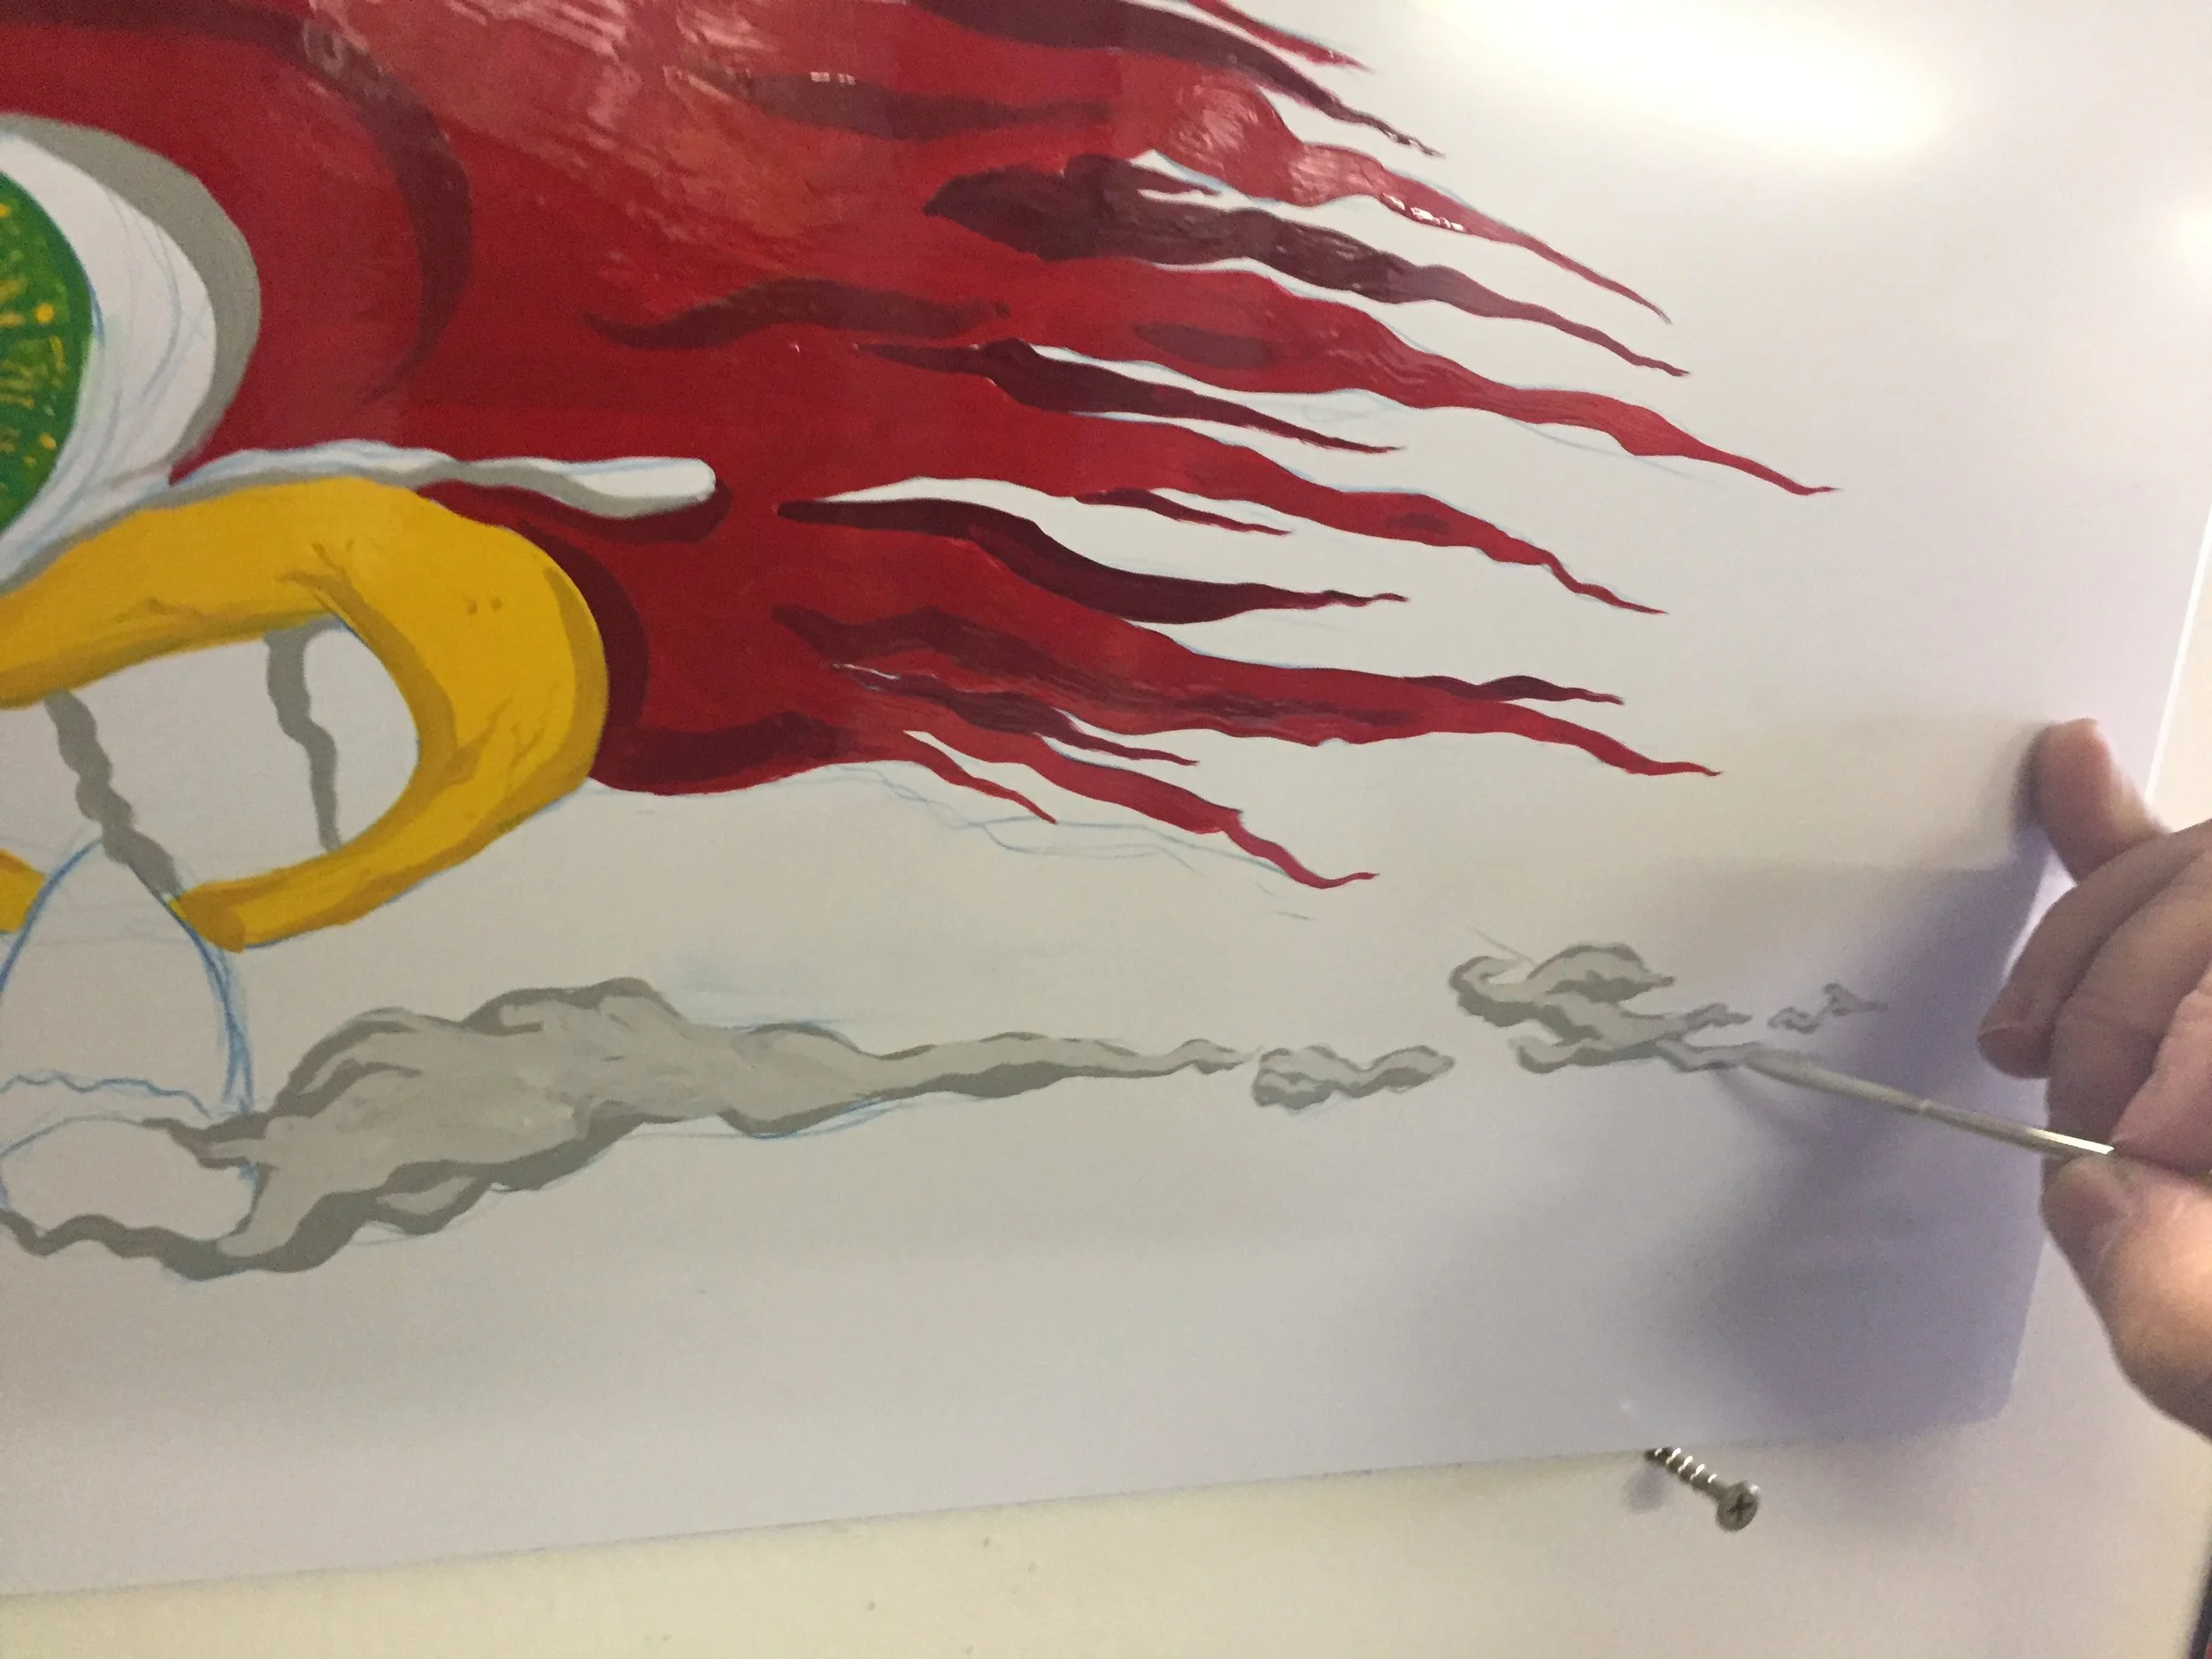
A little bit of highlights and the smoke starts looking a bit more “toony”.
I’m feeling really good about the movement that’s happening, so I guess now it’s time to start on some detail work.
Time for adding smoke to the cigar. I use some basic gray and then highlight it by adding some white to the mix giving it some depth and interest. I also take advantage of the gray and paint in some shadows around the eye, the tear, and teeth separations.
Step 5:
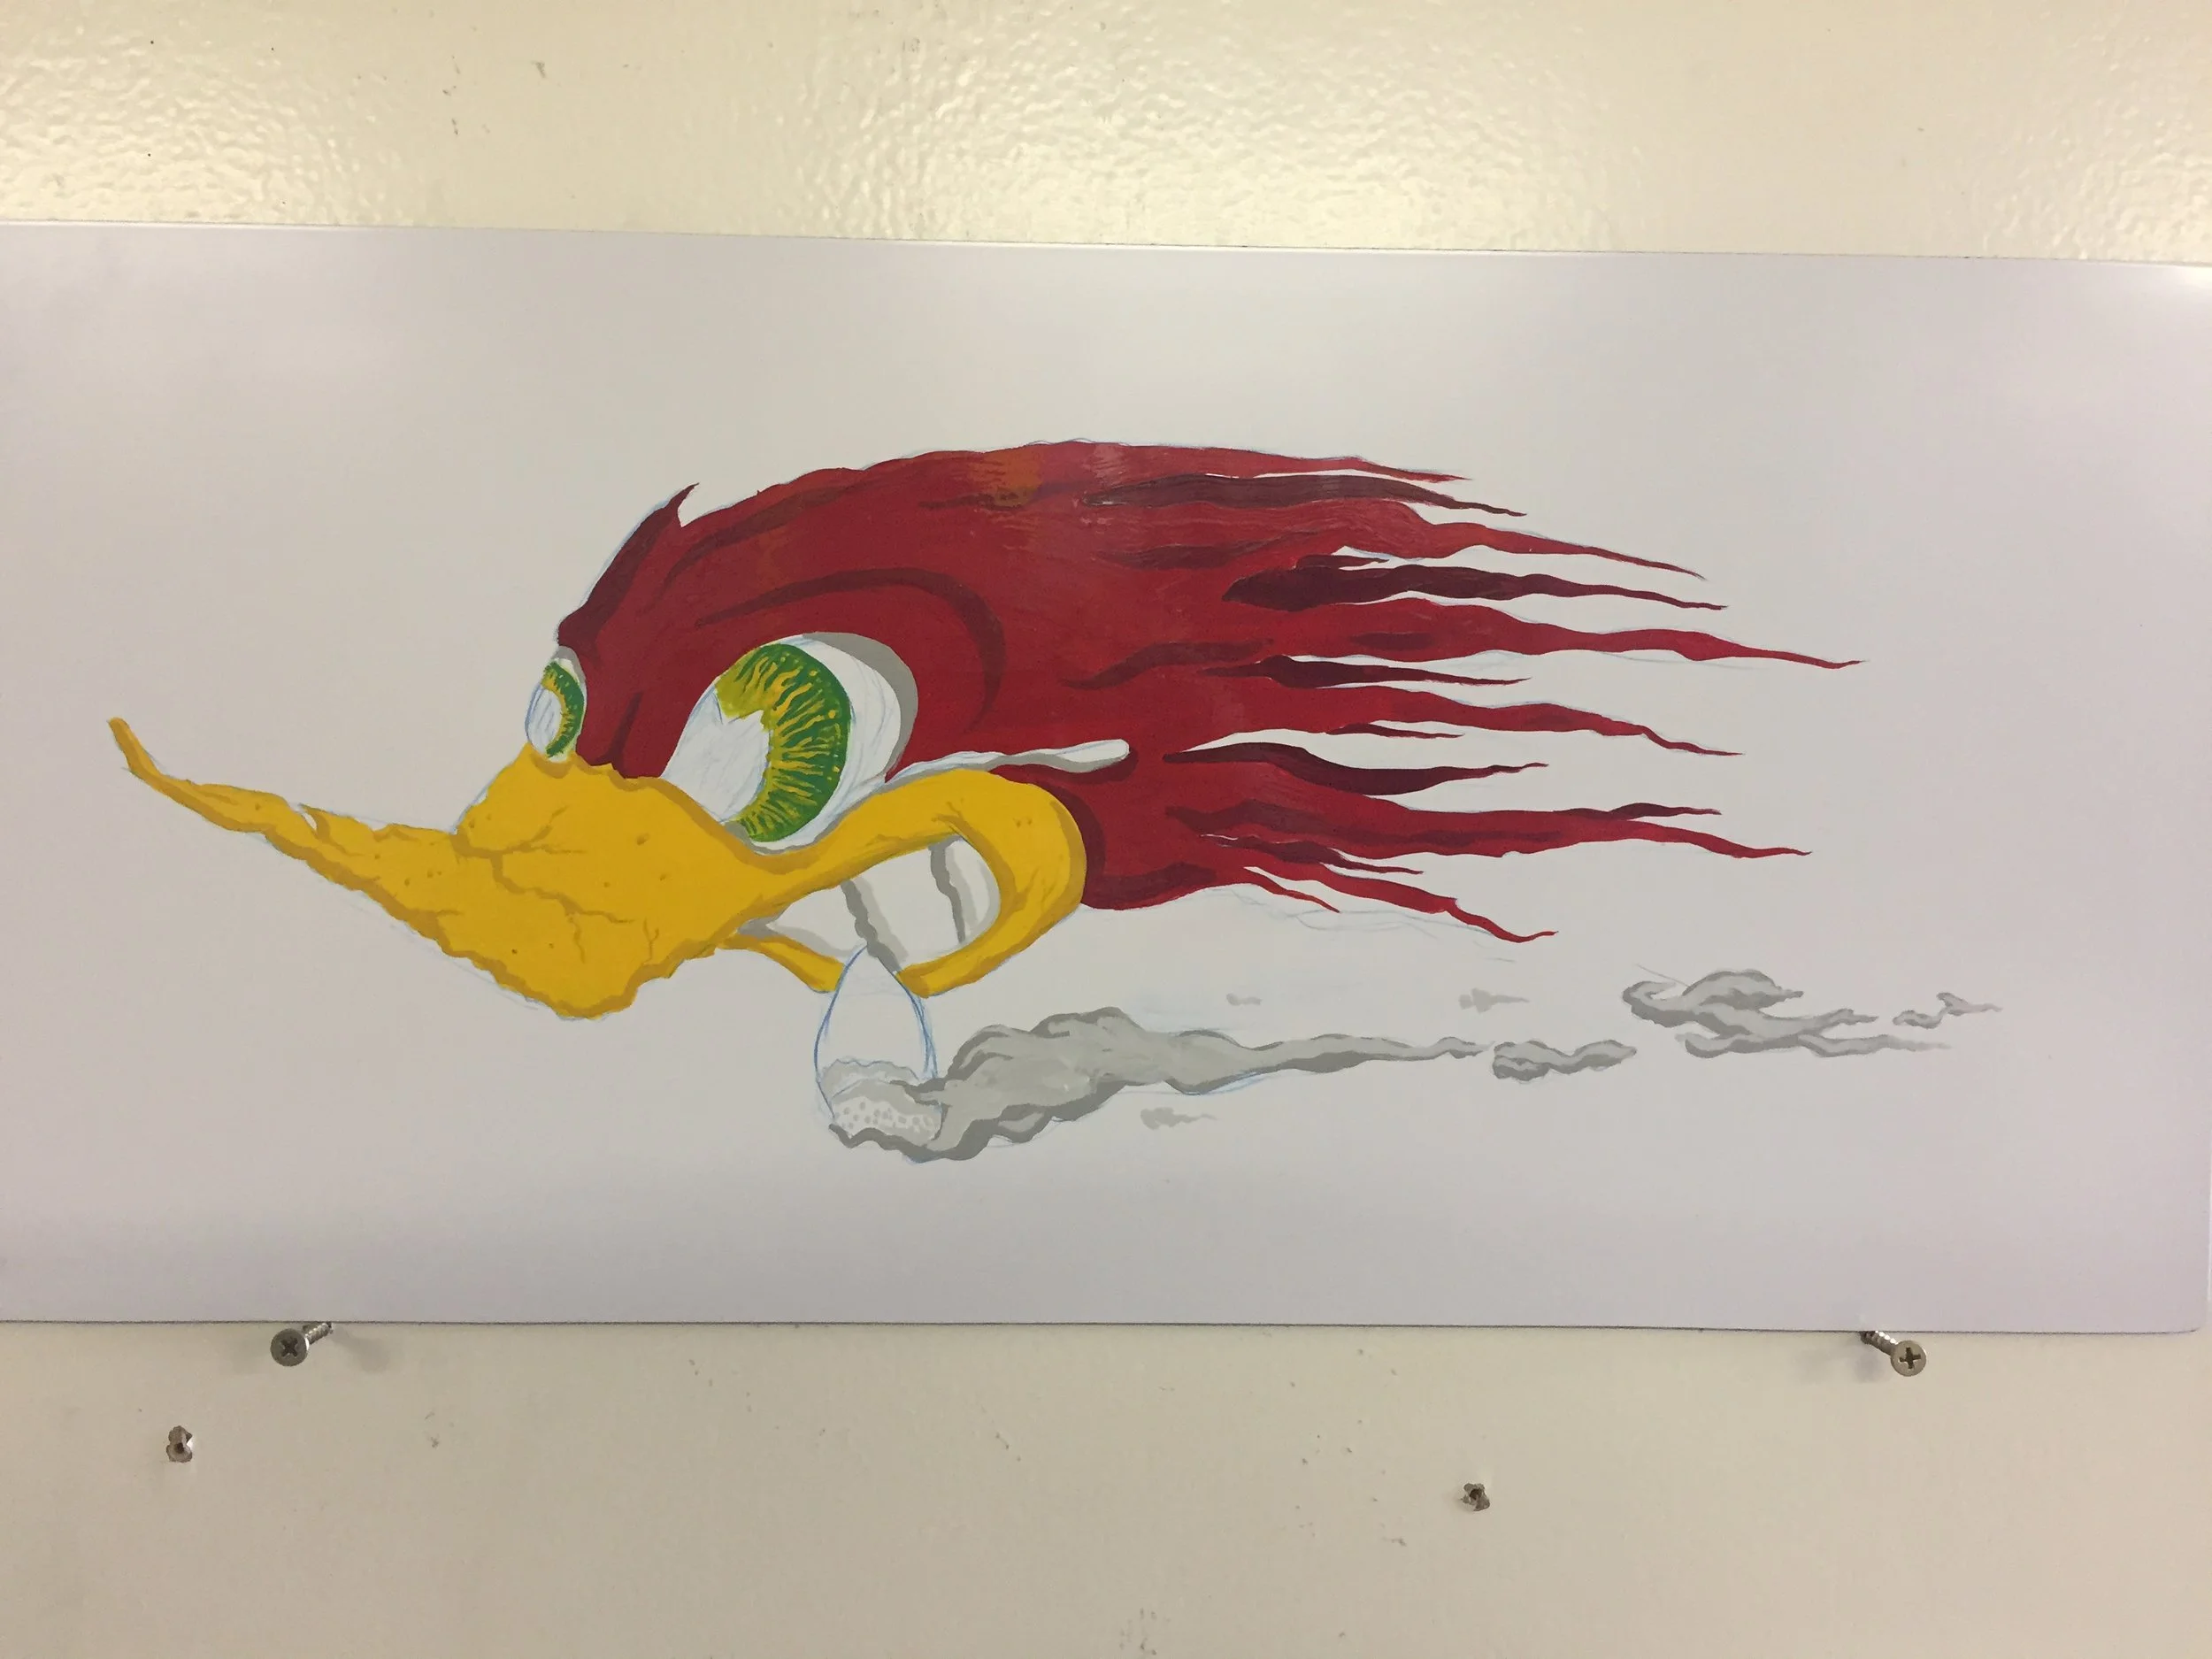
We all know birds have feathers, but when you’re doing a toony rendition of a bird you don’t have to fuss with the actual “feather” look. It’s almost assumed the the feathers have those details.

I add just a bit of brown to the cigar along with some lighter brown for highlights.
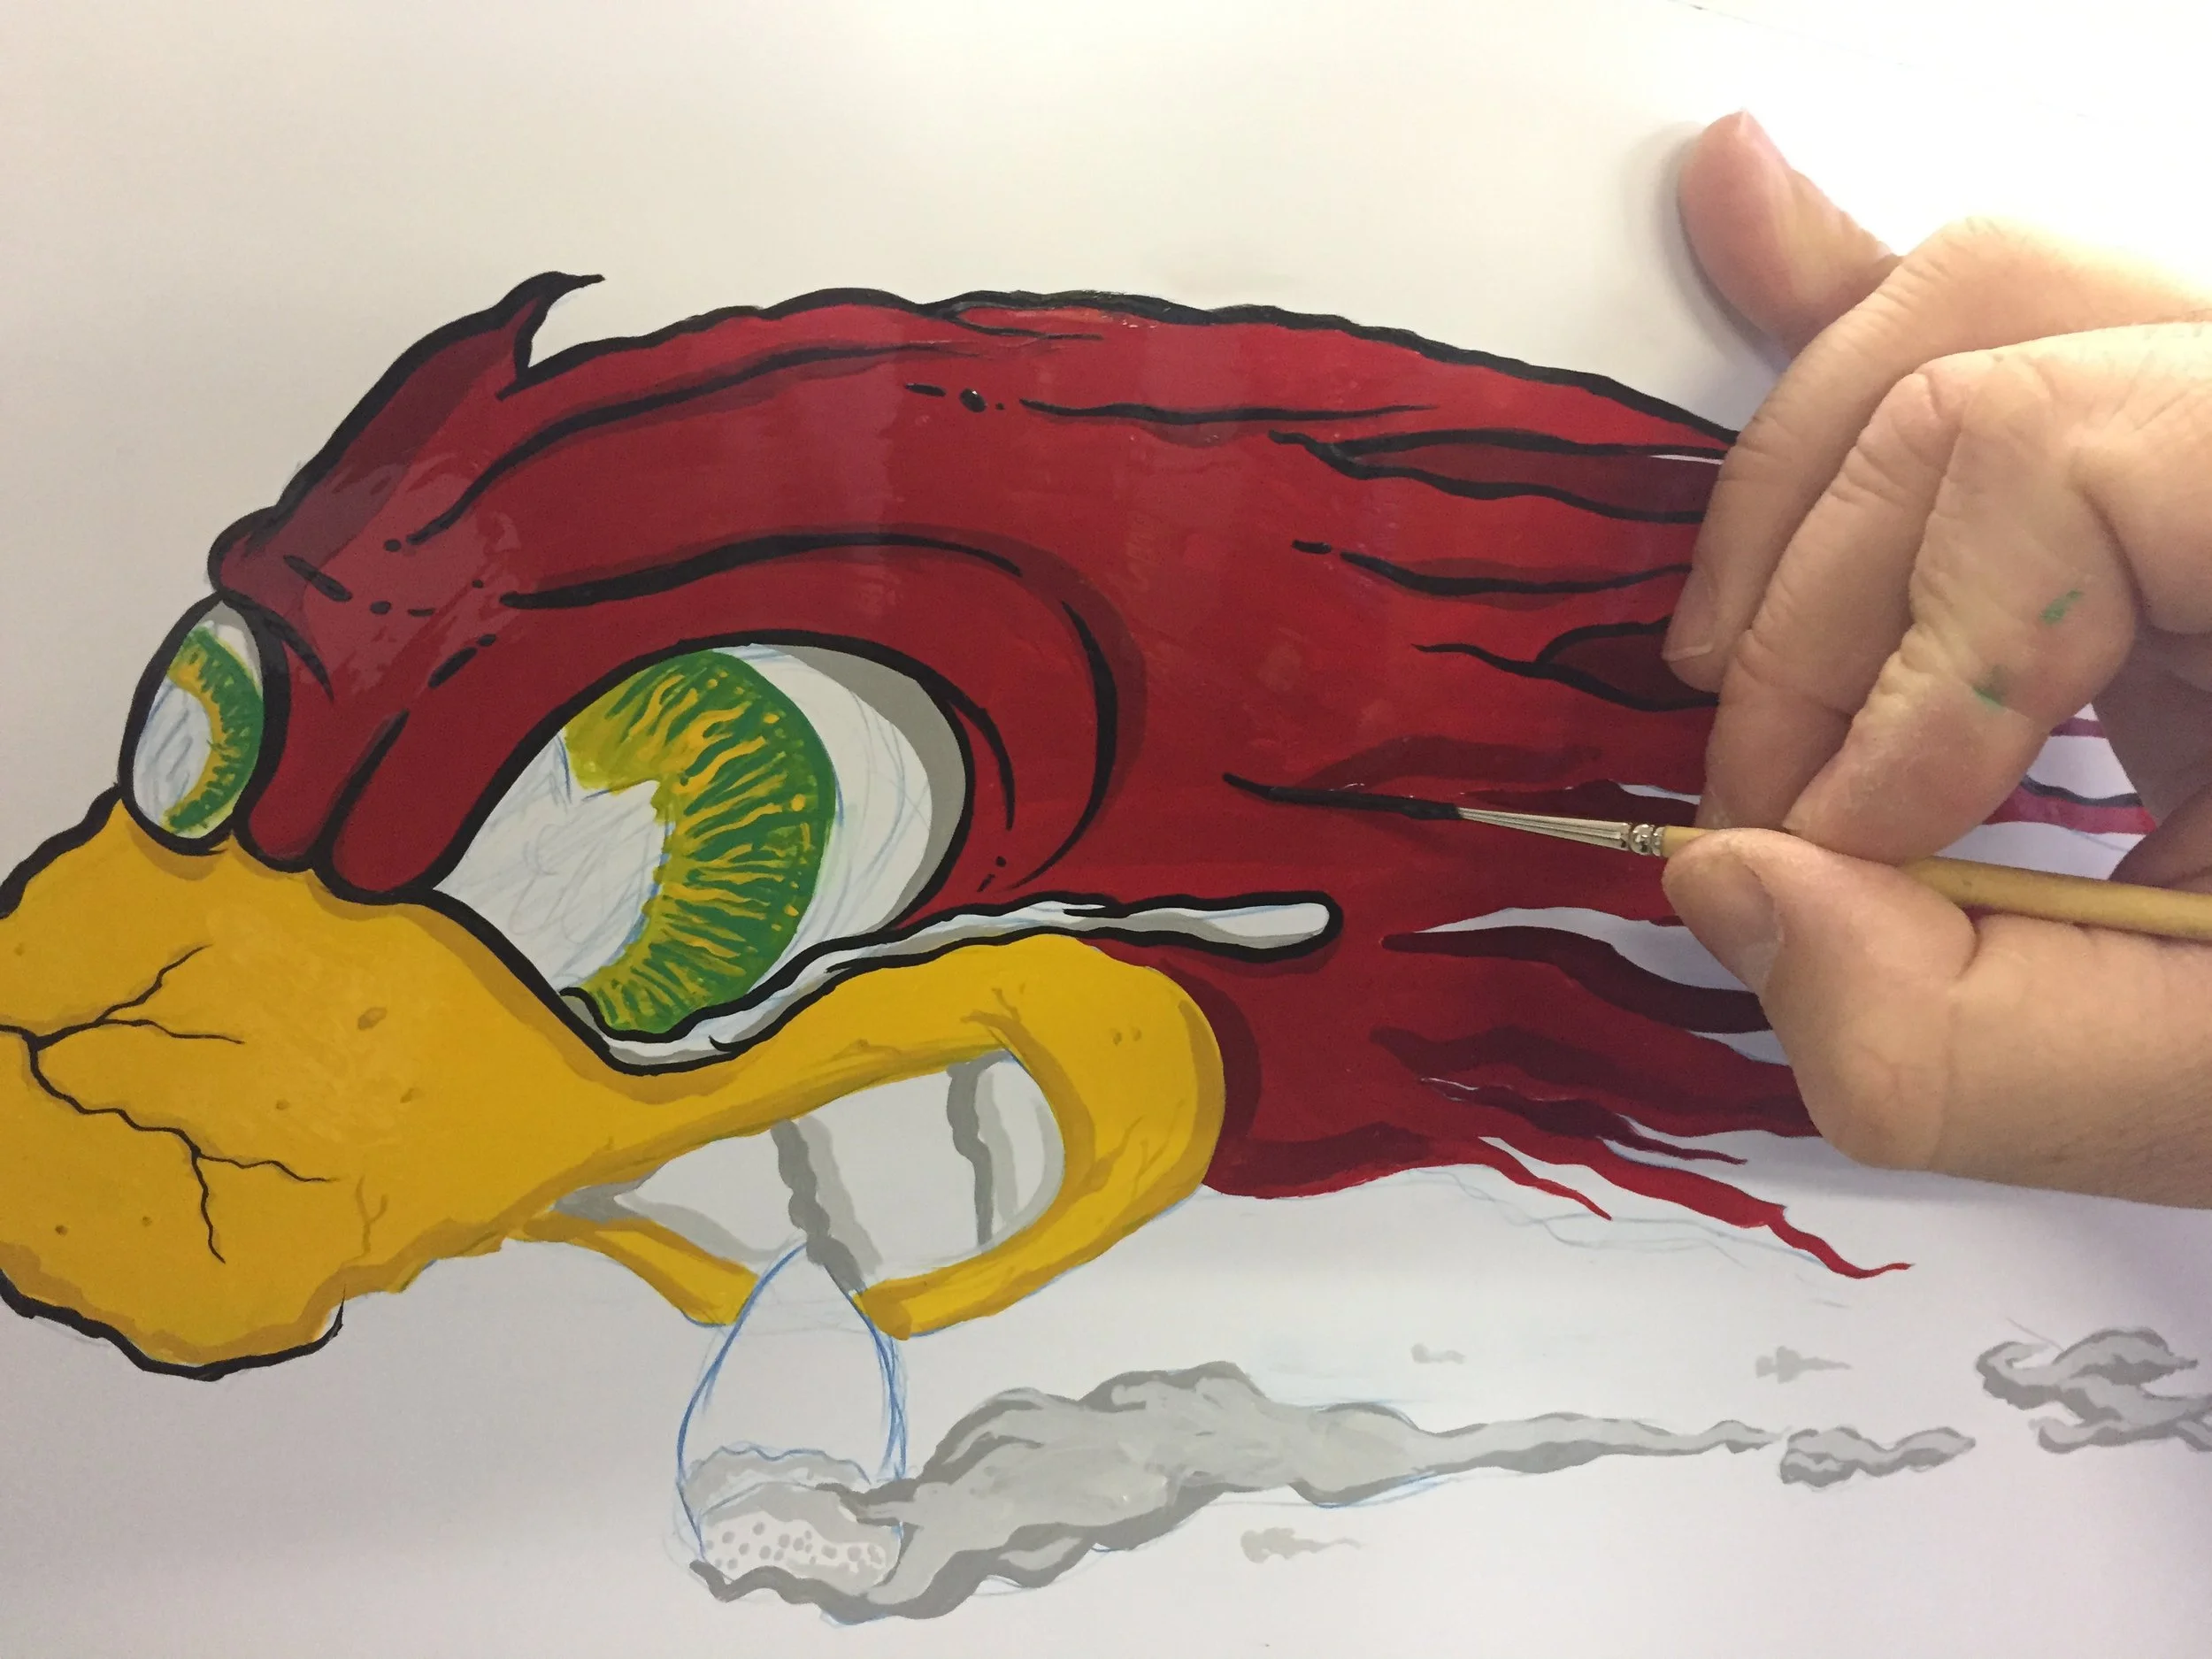
As with many of my influential artists from comic books and and surf & skate industry, I like to do small black lines mixed with thick “bold” black lines. It really pops this way.

I take the opportunity to customize the cigar band with a nickname my friend gave me a few years ago.
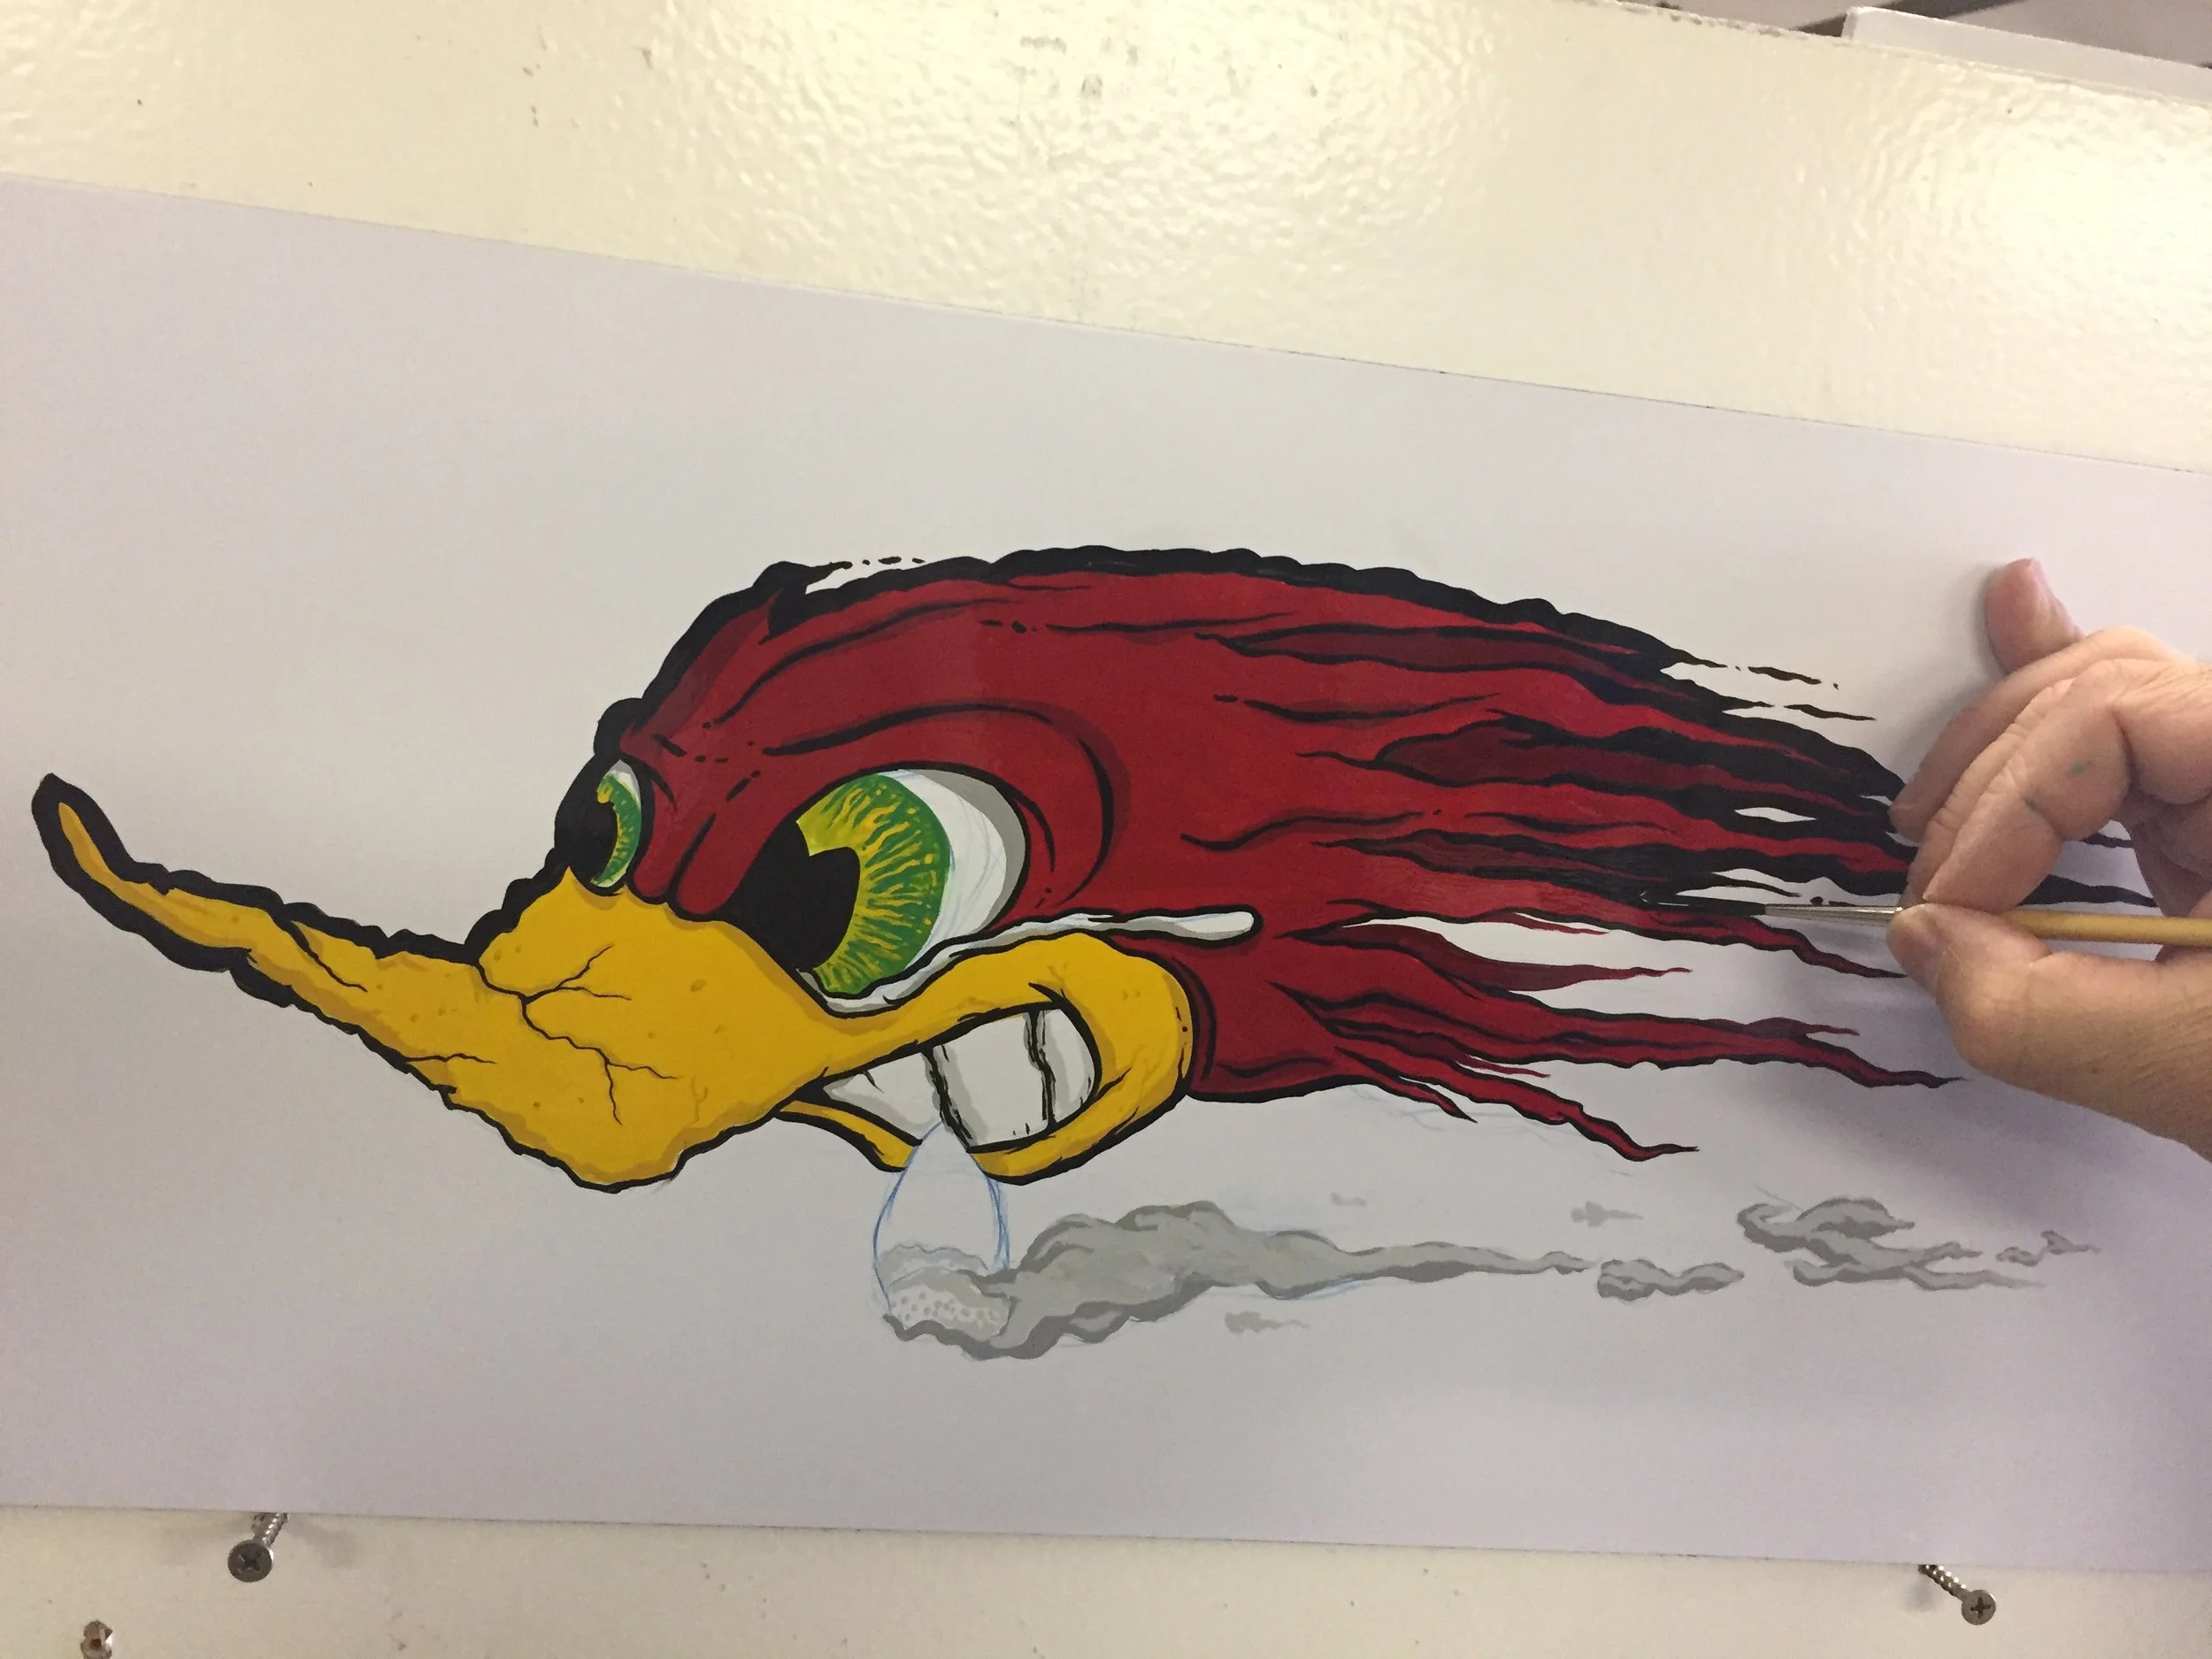
I also take the opportunity during this step, to add extra little grit and trailing lines to simulate more action and liveliness.

Final details to the cigar include adding some red, yellow, and orange to the end of it to give it a reason for the smoke. After all, what good is a cigar if it ain’t lit?
Now the fun part begins… I now start on the black details. This is what finally makes this piece “POP”. I especially love putting in the details. I mix a little bit of my comic book influences (Todd McFarlane & Jim Lee) as well as my Skate and Surf art influences (Jim Phillips & Vernon Courtlandt Johnson) into the mix and really take my time to make all of my lines precise.
Final:
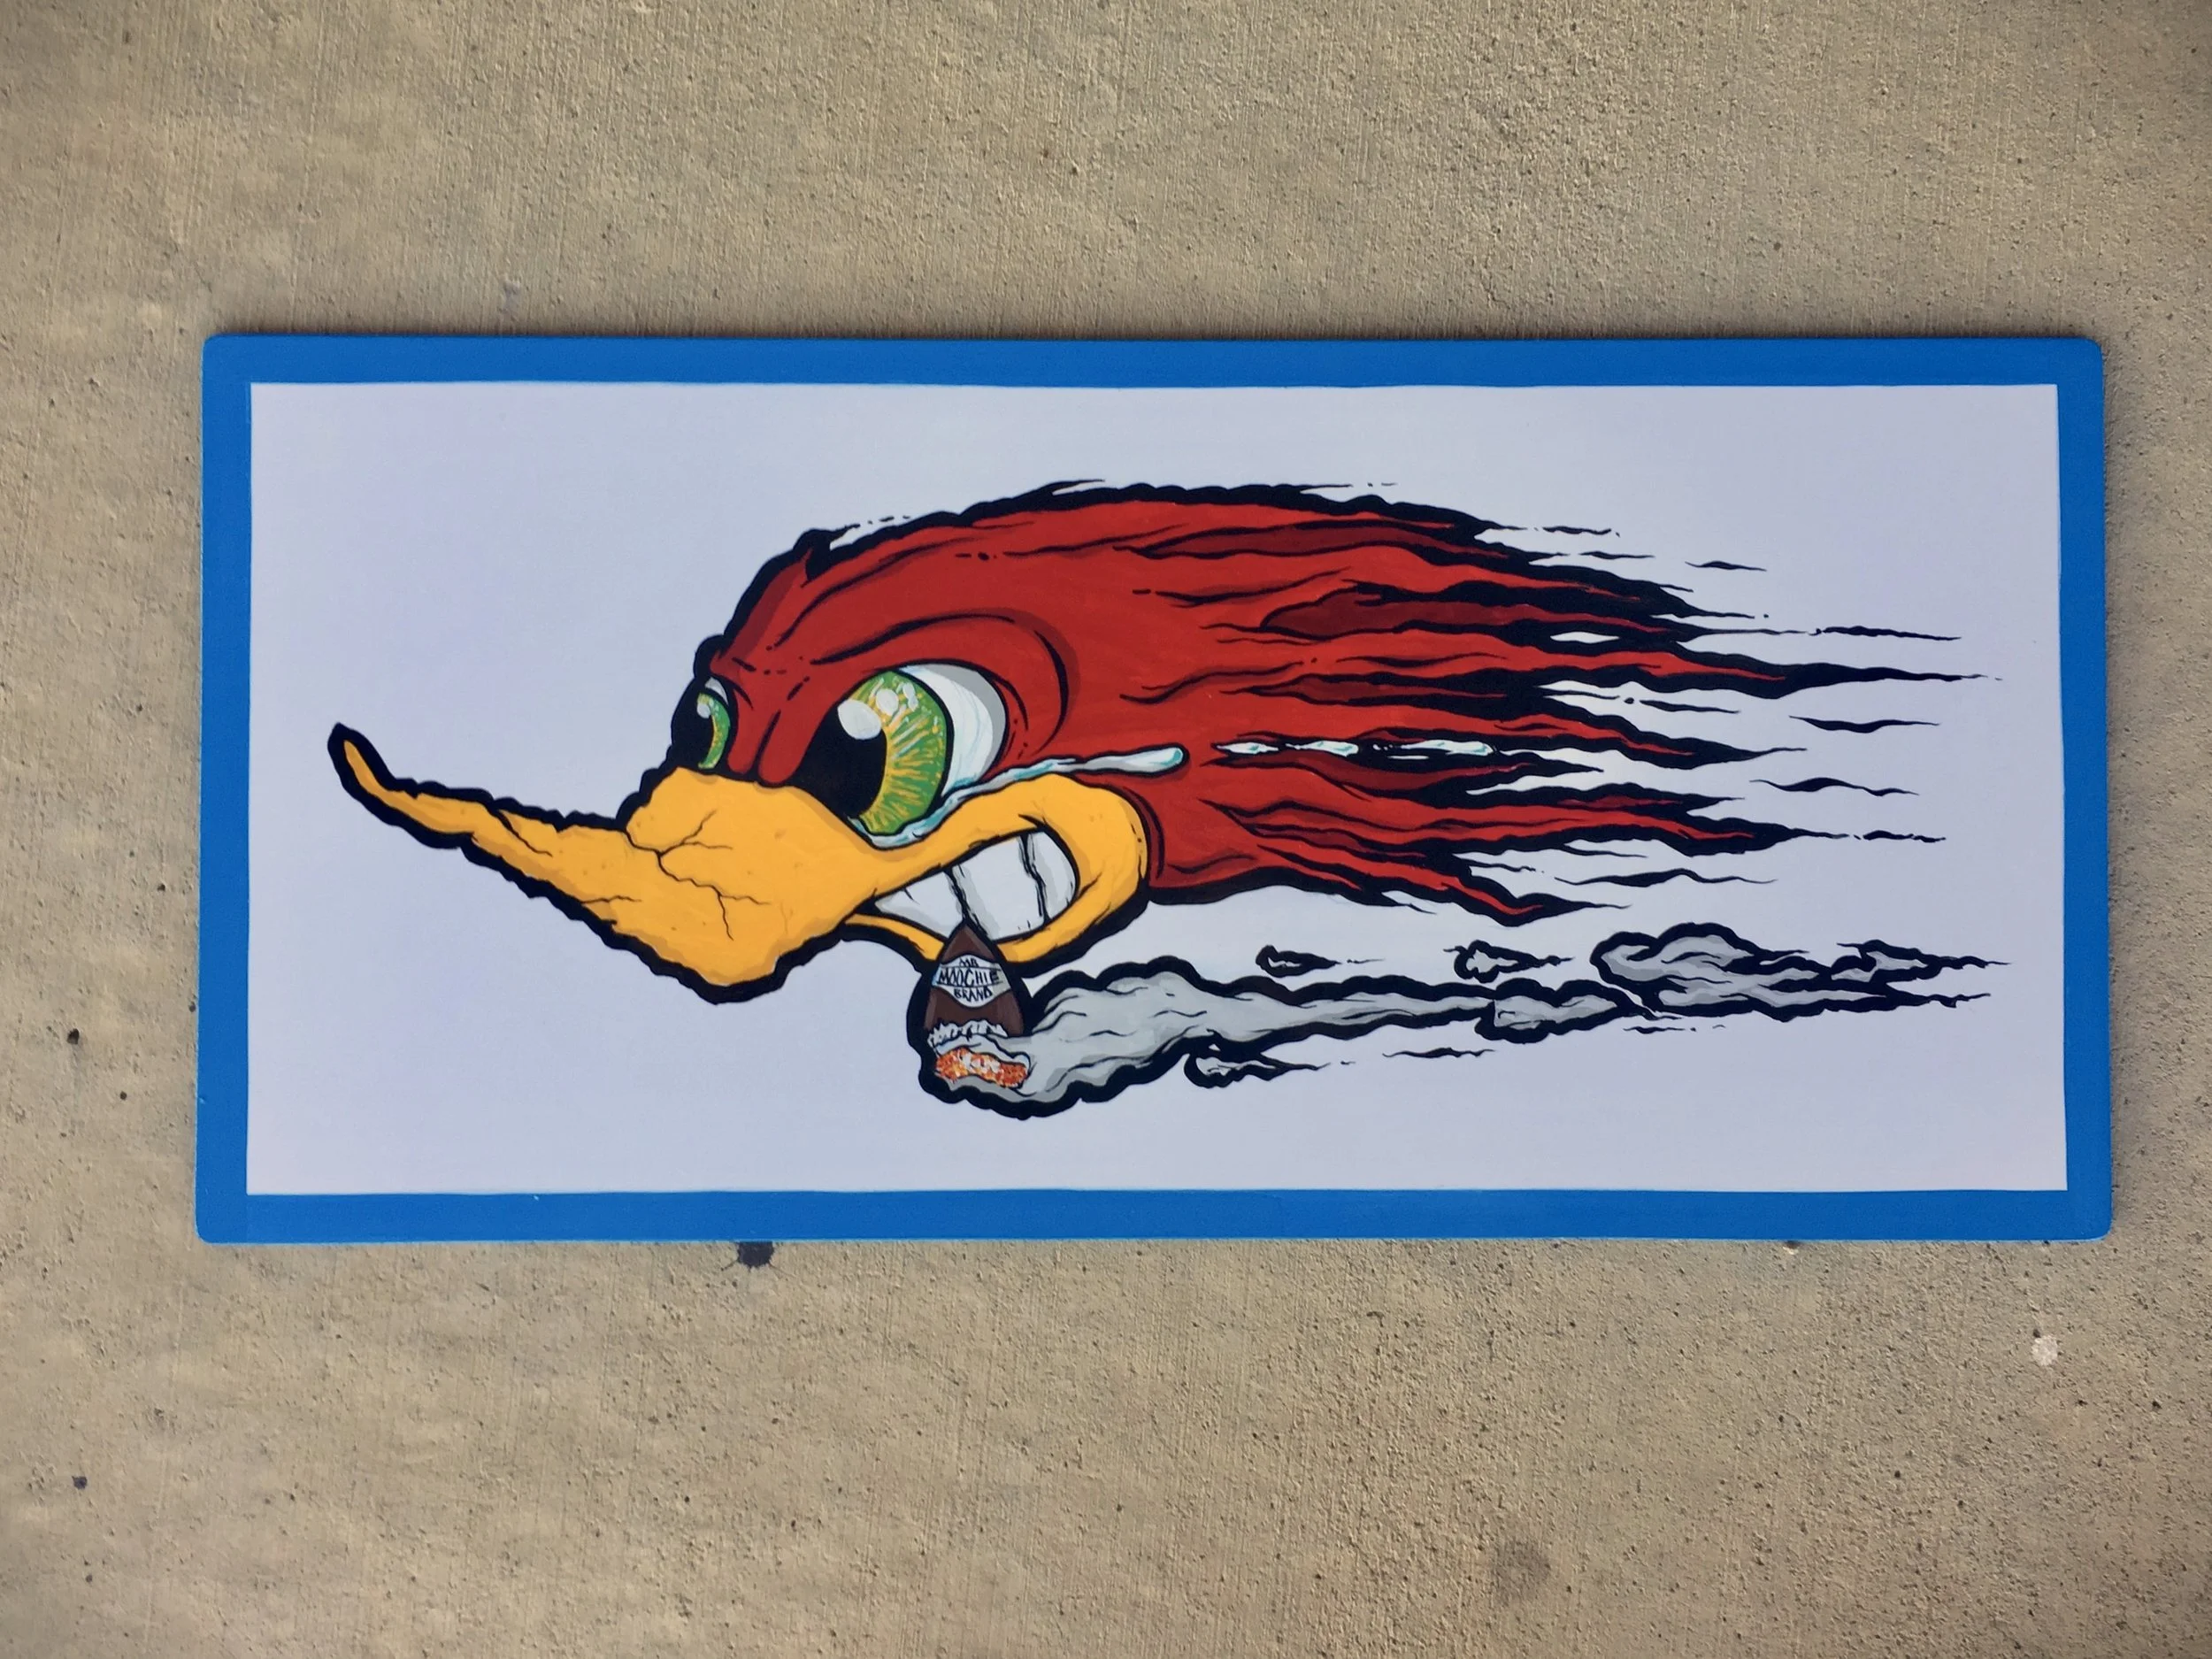
A nice bold blue border sets it off and does its best to contain this elusive horsepower-driven woodpecker. I absolutely loved doing this project and I am sure that there will be many more “suped-up” iconic characters to be resurrected soon!
I really loved how this one came out and I really had a lot of fun with this. In fact, I loved it so much I used it for some of my promotional items.. Hope this helps inspire you to get creating and remember to keep them brushes wet!